|
Below is a description of some of the new features in Paint Shop Pro that
change it from a good program to a great program.
Multiple Layer Support--makes it easy to create and edit
composite images by allowing users to experiment and control image variations
without affecting the entire image. Layers are like sheets of tracing
paper. You can 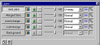 have
part of your image on one layer and another part on another layer. You
can add, copy, or delete them at any time; apply effects, deformations,
and filters to layers; make individual layers visible or invisible;
merge visible layers only; rearrange their order; change their opacity;
and blend their pixels in a variety of ways. Until merged they are independent
and can be edited or deleted without affecting the other layers.You
can create collages and montages, create easily editable Web buttons,
and apply different textures to images with ease. Being familiar with
Photoshop and layers, I tend to put everything on individual layers
so if I create a mess, I can just delete a layer and start over. have
part of your image on one layer and another part on another layer. You
can add, copy, or delete them at any time; apply effects, deformations,
and filters to layers; make individual layers visible or invisible;
merge visible layers only; rearrange their order; change their opacity;
and blend their pixels in a variety of ways. Until merged they are independent
and can be edited or deleted without affecting the other layers.You
can create collages and montages, create easily editable Web buttons,
and apply different textures to images with ease. Being familiar with
Photoshop and layers, I tend to put everything on individual layers
so if I create a mess, I can just delete a layer and start over.
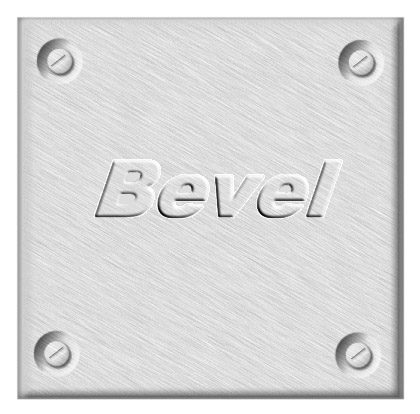
Layers have a functional as well as an artistic use. For the metallic
plate image, I followed a step-by-step tutorial in Teach Yourself Paint
Shop Pro 5 in 24 Hours, by T. Michael Clark, and used layers in a functional
manner. Differ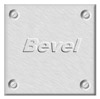 ent
layers were used for the background plate, the indents, the screws,
the slots, and the beveled text. By putting individual elements on separate
layers and copying them using the merge visible layers only command,
I saved time. After creating the metallic plate on one layer, a circular
indent was drawn on another layer and placed on the left. This indent
layer was then copied onto a new layer so an indent was also placed
on the right. Then these two layers were merged and this merged layer
of two top indents was copied to another new layer so indents were placed
on the bottom. Then these two plates of top and bottom indents were
merged into one layer. Then the same procedure was repeated to produce
the screws and then the slots on top. It was not really difficult and
took less time because of the use of layers. ent
layers were used for the background plate, the indents, the screws,
the slots, and the beveled text. By putting individual elements on separate
layers and copying them using the merge visible layers only command,
I saved time. After creating the metallic plate on one layer, a circular
indent was drawn on another layer and placed on the left. This indent
layer was then copied onto a new layer so an indent was also placed
on the right. Then these two layers were merged and this merged layer
of two top indents was copied to another new layer so indents were placed
on the bottom. Then these two plates of top and bottom indents were
merged into one layer. Then the same procedure was repeated to produce
the screws and then the slots on top. It was not really difficult and
took less time because of the use of layers.
 The
layer blend modes are great for creating artistic and unique images.
You are combining the pixels from the current layer with the ones under
it; but you are not combining the layers permanently until you use the
merge command so you can play and play until you create that masterpiece.
There are 17 blend modes to work with. Frequently I used two copies
of the same photo; placed the photos on two different layers; applied
different effects to each layer; and then changed the opacity and blend
mode. Most of the images used for this review were created using layers
and changing the opacity and blend mode. The
layer blend modes are great for creating artistic and unique images.
You are combining the pixels from the current layer with the ones under
it; but you are not combining the layers permanently until you use the
merge command so you can play and play until you create that masterpiece.
There are 17 blend modes to work with. Frequently I used two copies
of the same photo; placed the photos on two different layers; applied
different effects to each layer; and then changed the opacity and blend
mode. Most of the images used for this review were created using layers
and changing the opacity and blend mode.
Free-form Deformation Tool--with
just one tool you can quickly move (transform), scale, rotate, skew
and add perspective to layers, selections or an image, thus saving time
spent on individual deformation operation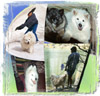 s.
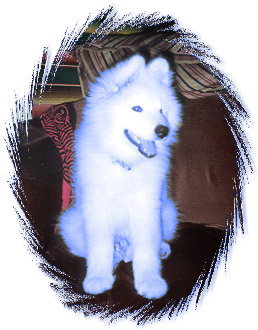
Paint Shop Pro has three ways to deform images: (1) with the free-form
deformation tool; (2) with the deformation browser which has preset
deformation values; and (3) with the deformation dialog boxes which
let you make your own choices. For the image to the left, I scanned
in four photos; put each image on a separate layer; used the deformation
tool on some of the layers; and then used the deformation dialog boxes
for the others. I then applied a linear gradient fill with the flood
fill tool to the background. To give it a finished look, I applied an
edge from a third-party plug-in. I also used the deformation tool to
create the text in the Doggie Picture Tube image below. s.
Paint Shop Pro has three ways to deform images: (1) with the free-form
deformation tool; (2) with the deformation browser which has preset
deformation values; and (3) with the deformation dialog boxes which
let you make your own choices. For the image to the left, I scanned
in four photos; put each image on a separate layer; used the deformation
tool on some of the layers; and then used the deformation dialog boxes
for the others. I then applied a linear gradient fill with the flood
fill tool to the background. To give it a finished look, I applied an
edge from a third-party plug-in. I also used the deformation tool to
create the text in the Doggie Picture Tube image below.
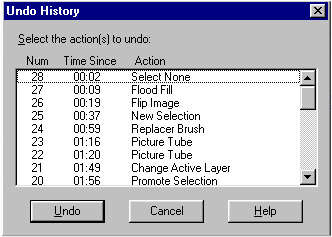
Multiple Level Undo--a viewable
history window, makes it possible for users to easily r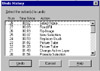 eturn
to any editing step. A wide variety of preference options allows users
to tailor the undo support to their specific system resources. Once
you start using the history window, you can't see how you did without
it. I tend to apply effect after effect and really play with an image.
If I decide I don't like the last 20 moves or so, instead of deleting
each one individually, I just go to the history window and delete all
unwanted moves with just one click. eturn
to any editing step. A wide variety of preference options allows users
to tailor the undo support to their specific system resources. Once
you start using the history window, you can't see how you did without
it. I tend to apply effect after effect and really play with an image.
If I decide I don't like the last 20 moves or so, instead of deleting
each one individually, I just go to the history window and delete all
unwanted moves with just one click.
Support of 44 Unique Graphic File Types--this new or enhanced support includes
PSD, KDC, FPX, PCD, IFF, SCT, EMF and PSP file formats as well as Adobe file format plug-ins. Since I use Photoshop
frequently and have saved important actions in the program that I wanted to use on some of the images created in
Paint Shop Pro for this review, I decided to test if you could bring a Paint Shop Pro image into Photoshop and
continue working on it. No problems arose when I did this. I could take an image created in either program and
then bring it into the other program and still work on it. Various Adobe filters and plug-ins, such as Photo/Graphic
Edges from Auto F/X and PhotoFrames from Extensis, that were installed for Photoshop, became available in Paint
Shop Pro when I went into the Preferences in Paint Shop Pro and indicated where they were located.
TWAIN Device Support--support all compatible and imaging devices. Direct interface
support for the popular Kodak DC 40, DC 50 and DC120 cameras has also been added.
Pressure-sensitive Tablet--users can now create and edit images with variable
brush opacity, width, and color controls using a pressure-sensitive tablet and a digitizing pen or other input
device.
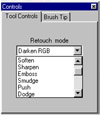 Retouching Brushes--now includes many
of the effects as the adjust color commands, such as dodge, burn, saturation,
hue, lightness, and HSL-to-target modes, allowing the natural correction
of image exposure and color levels in any part of an image.The retouch
tool is perfect when you want to paint with the effect rather than apply
it to the entire image or selection. Teach Youself Paint Shop Pro 5
in 24 Hours has a great tutorial on using the retouch brush to remove
braces from teeth. Retouching Brushes--now includes many
of the effects as the adjust color commands, such as dodge, burn, saturation,
hue, lightness, and HSL-to-target modes, allowing the natural correction
of image exposure and color levels in any part of an image.The retouch
tool is perfect when you want to paint with the effect rather than apply
it to the entire image or selection. Teach Youself Paint Shop Pro 5
in 24 Hours has a great tutorial on using the retouch brush to remove
braces from teeth.
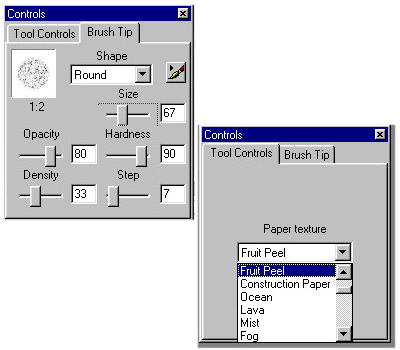
Brush Tip Palette--features complete brush settings, giving users full command
over their brush size, shape, opacity, density, hardness and step size. The brush tip palette is very handy.
Cust om Brush--allows
users to create custom Photoshop-compatible brush tips or shapes. A
database of custom brushes can be created to store the brushes for easy
retrieval and use. I loved this feature. I scanned in two rocks from
the Berlin Wall (the real McCoy, gotten on a trip to Germany) and made
a custom brush from the scanned rocks. This custom brush was used for
the background of this image and for the water, dog, figure graphic
below in the Arithmetic Function section. om Brush--allows
users to create custom Photoshop-compatible brush tips or shapes. A
database of custom brushes can be created to store the brushes for easy
retrieval and use. I loved this feature. I scanned in two rocks from
the Berlin Wall (the real McCoy, gotten on a trip to Germany) and made
a custom brush from the scanned rocks. This custom brush was used for
the background of this image and for the water, dog, figure graphic
below in the Arithmetic Function section.
Selection Tools--includes Freehand, Point-to-Point and Smart Edge options,
so it is easy to make accurate selection areas the first time, without detailed editing. For the curled page image,
I followed a step-by-step tutorial from Teach Yourself Paint Shop Pro 5.0 in 24 Hours. I used the freehand tool
and set the selection type to point-to-point to create the curl. The line tool was used with the Bezier type utilized
for the curve.
Crop Tool--allows for more precise control of the cropping procedure. This
tool is great. When you want to crop an image, you simply select the crop tool and click-and-drag to outline the
area you want to crop. You can then resize the cropping area by clicking-and-dragging the edges of the area, or
you can move the cropping area by dragging the cropped area. Then you just double-click and the job is done. Cropping
size options may also be set from a dialog box, further enhancing the entire process.
File Browser--features a familiar
Explorer-style view, letting users easily navigate through directories
of files to visually search for their images. I wish every program had
this feature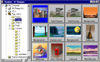 .
The browser is a tree-based browser similar to the Windows Explorer.
It is a visual file system that makes image file management easier and
more intuitive. When you select a folder in the browser, Paint Shop
Pro displays thumbnails of the images within the folder. You can open,
move, rename, and delete files using these thumbnails.You can even add
layers to an image. Even if I am going to work in another program such
as Photoshop, I will still use Paint Shop Pro and the browser to organize
and view my images. It is much easier to use when you are moving and
deleting files as you are working on the visual image and not just a
file name. This prevents moving or deleting the wrong files because
you are confused about the file names. .
The browser is a tree-based browser similar to the Windows Explorer.
It is a visual file system that makes image file management easier and
more intuitive. When you select a folder in the browser, Paint Shop
Pro displays thumbnails of the images within the folder. You can open,
move, rename, and delete files using these thumbnails.You can even add
layers to an image. Even if I am going to work in another program such
as Photoshop, I will still use Paint Shop Pro and the browser to organize
and view my images. It is much easier to use when you are moving and
deleting files as you are working on the visual image and not just a
file name. This prevents moving or deleting the wrong files because
you are confused about the file names.
Picture Tubes--allows for a sequence
of pre-made images to be inserted as the 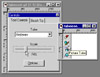 user
clicks and/or drags the mouse across the image, letting users easily
apply and rea user
clicks and/or drags the mouse across the image, letting users easily
apply and rea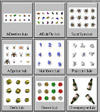 pply
clipart or other graphic objects to their images. Tubes are in! Many
Web sites have sprung up just to offer picture tubes to Paint Shop Pro
users and Jasc Software constantly has free Picture Tubes to download.
(See the Recommended Demos Section on our site for the link.) Picture
Tubes are really just a form of the paint brush tool; it is like a rubber
stamp in that it allows you to reproduce the same image, or set of images,
again and again. You can use tubes to create seamless backgrounds or
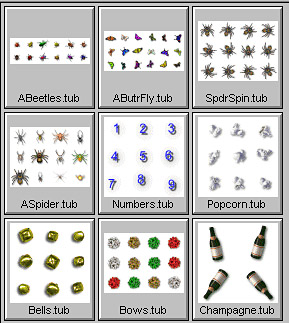
backgrounds for logos. Tubes are built from images arranged in a grid.
A tube can consist of one object in a variety of colors and/or effects,
or a variety of related objects. The image on the right is a screen
shot of some of the tube files that come with Paint Shop Pro and shows
how they are arranged in cells. pply
clipart or other graphic objects to their images. Tubes are in! Many
Web sites have sprung up just to offer picture tubes to Paint Shop Pro
users and Jasc Software constantly has free Picture Tubes to download.
(See the Recommended Demos Section on our site for the link.) Picture
Tubes are really just a form of the paint brush tool; it is like a rubber
stamp in that it allows you to reproduce the same image, or set of images,
again and again. You can use tubes to create seamless backgrounds or
backgrounds for logos. Tubes are built from images arranged in a grid.
A tube can consist of one object in a variety of colors and/or effects,
or a variety of related objects. The image on the right is a screen
shot of some of the tube files that come with Paint Shop Pro and shows
how they are arranged in cells.
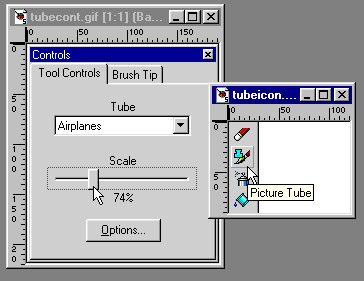
The Picture Tube options palette lets you control how the objects appear.
- The placement mode determines whether the objects in the tube image appear at random or at fixed intervals
as you are painting.
- The step size controls the distance between the intervals at which the tubes appear, as you decrease the step
size, the distance between images decreases.
- The selection mode controls how images are selected from among the other objects in the tube: the random mode
randomly selects images in the tube; the incremental mode selects the first image in the tube and repeats it only
after it has selected all the images; the angular mode selects images based on the direction you drag the cursor
as you paint; the pressure mode uses pressure from a pressure sensitive pad to determine which image to select;
and the velocity mode selects images based on the speed you drag the cursor as you paint.
You c an
make your own Picture Tubes by creating a grid of cells on a transparent
backgr an
make your own Picture Tubes by creating a grid of cells on a transparent
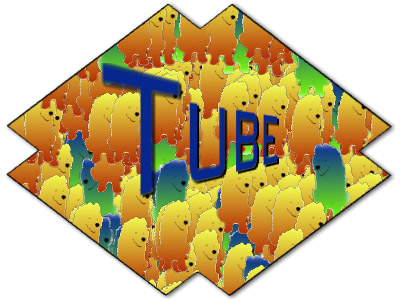
backgr ound and then
filling each cell with an image. You then export the file as a Picture
Tube and it is added to the list of tubes on the control palette. For
the dog image, I started with the original dog photo that was used to
make the glowing blue dog above, cut out the dog, filed him with different
linear fills and created a cartoon dog. I then used the cartoon dog
to create a tube. I opened a new file, filled the background layer ound and then
filling each cell with an image. You then export the file as a Picture
Tube and it is added to the list of tubes on the control palette. For
the dog image, I started with the original dog photo that was used to
make the glowing blue dog above, cut out the dog, filed him with different
linear fills and created a cartoon dog. I then used the cartoon dog
to create a tube. I opened a new file, filled the background layer  using
the dog picture tube, placed the text on another layer, used the extortion
tool to give depth to the text, and then applied a frame. For the foot
image, I used the black foot tube that came with Paint Shop Pro, changed
the opacity and blend modes and produce an interesting glowing feet
effect. using
the dog picture tube, placed the text on another layer, used the extortion
tool to give depth to the text, and then applied a frame. For the foot
image, I used the black foot tube that came with Paint Shop Pro, changed
the opacity and blend modes and produce an interesting glowing feet
effect.
CMYK color separations--printing and output of CMYK color separations is now
supported. Paint Shop Pro 5 can separate images into the four CMYK channels for individual channel editing and
save images as CMYK TIF files.
Color Management System--fully integrated support for Microsoft's ICM 2.0 color
management system in Windows 98 and Windows NT 5.0 allows for consistent color previewing across different imaging
devices.
Import and Export Plug-ins--can use industry-standard Adobe import and export
plug-ins to connect custom devices, such as specialized printers, cameras, and scanners, to Paint Shop Pro 5.
|
|
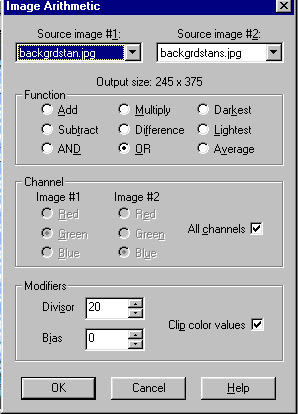
Arithmetic Function--This is feature
that truly creates unique images. I used the image arithmetic function
to combine data from two images; I used the figure, water, and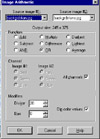 dog photo (my own) an
 d
a photo of a building from the Paint Shop Pro CD to create a third image
that is a product of the source image's color data. Different formulas
will result in different effects. You can combine images using the following
options: add, subtract, multiply, difference, lightest, darkest, average,
or, and. An interesting image can be created by combining the arithmetic
function and effects and then changing the opacity and blend mode. d
a photo of a building from the Paint Shop Pro CD to create a third image
that is a product of the source image's color data. Different formulas
will result in different effects. You can combine images using the following
options: add, subtract, multiply, difference, lightest, darkest, average,
or, and. An interesting image can be created by combining the arithmetic
function and effects and then changing the opacity and blend mode.
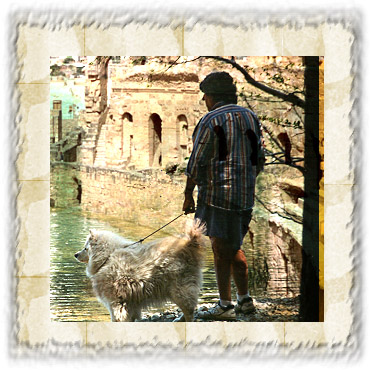
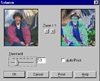
Painting with Texture--you can paint
with a texture such as: sidewalk, marble, parchment, fruit  peel,
construction paper, ocean, lava, mist, and fog. I used the fruit peel
texture for the dog and figure image background. The figure was cut
from another picture using the Smart Edge selection tool. I used multiple
layers and changed the opacity and blend mode to achieve the effect. peel,
construction paper, ocean, lava, mist, and fog. I used the fruit peel
texture for the dog and figure image background. The figure was cut
from another picture using the Smart Edge selection tool. I used multiple
layers and changed the opacity and blend mode to achieve the effect.
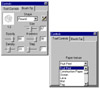
Filter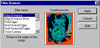 s--they
can enhance any image. You can select filters by choosing them from
the filter browser or from the image menu. The filter browser is a convenient
way to preview filters. When you select a filter from the filter name
list the sample preview displays its effect on the image. s--they
can enhance any image. You can select filters by choosing them from
the filter browser or from the image menu. The filter browser is a convenient
way to preview filters. When you select a filter from the filter name
list the sample preview displays its effect on the image.
Edge Filters-- I used the edge filters on a variety of the
images for this review. They work will when combined with Paint Shop
Pro effects, the arithmetic function, and variations in opacity and
blend modes to create a variety of effects.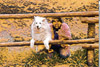
- Enhance--enhances the edits in the image;
- Enhance More--applies a stronger enhancement of the edges in the image;
Find All--enhances the contrasts between light and dark in the image by darkening the image and then highlighting
the edges;
- Find Horizontal--enhances the horizontal edges in the image using the method of the Find All filter;
- Find Vertical--enhances the vertical edges in the image using the method of the Find All filter;
- Trace Contour--Lightens the entire image but turns contours black.
Blur Filters--these filters smooth transitions by averaging the pixels next to hard edges of defined
lines and shaded areas where there are significant color transitions. Paint Shop Pro includes the following blur
filters: Gaussian blur, blur, blur more, soften, soften more, and motion blur.
Effects--the buttonize, chisel, cutout effect, and drop shadow effects are
nifty.
- Buttonize--You can add interest to your Web page by creating
square or rectangu
 lar buttons from
any image or selection. You can create a button with shadows or bevels,
raised or sunken with just a few mouse clicks. I created the head
button using the buttonize effect; and then I used this button in
other images. For the image to the left, I put the button graphic
on one layer and rock graphic on the other, then played with the opacity
of the layers, and used the dissolve mode to create the sparkle effect. lar buttons from
any image or selection. You can create a button with shadows or bevels,
raised or sunken with just a few mouse clicks. I created the head
button using the buttonize effect; and then I used this button in
other images. For the image to the left, I put the button graphic
on one layer and rock graphic on the other, then played with the opacity
of the layers, and used the dissolve mode to create the sparkle effect.
- Chisel effect--this effect adds a three-dimensional border around a selection or layer to make it appear
as though it were cut of of stone.
- Cutout effect--this effect creates the illusion that part of the image has been removed, allowing you
to see through the image to a lower level.
- Drop Shadow--this is an easy way to add drop shadow to text to create interesting effects.
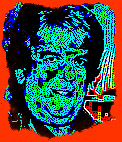
Colo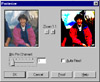 r Adjustment Commands--There
are three commands that I used extensively, alone and in conjunction
with the edge filter effects. You can create popart or cartoon f r Adjustment Commands--There
are three commands that I used extensively, alone and in conjunction
with the edge filter effects. You can create popart or cartoon f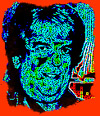 igures
of your friends with these color adjustment commands. The face image
to the right is an example. igures
of your friends with these color adjustment commands. The face image
to the right is an example.
- Colorize Command--converts an image or selection to a uniform hue and saturation while retaining its
lightness. You can use it to create sepia tones and other single-color effects;
- Posterize Command--reduces the number of bits per color channel,
thus you get a flatter-looking image with a pronounced choppiness
in the gradients;
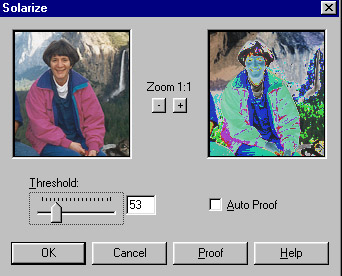
- Solarize Command--replaces the color value of each color with its opposite on the 0-255 scale.
Plug-ins--There are many third-party plug-ins that work with Paint Shop
Pro. I mentioned Photo/Graphic Edges from Auto F/X and PhotoFrames from Extensis above. Once you use filters, you
are addicted, especially to frames. With PhotoFrame, you can put unique frames around your photos. But Photo/Graphic
Edges not only allows you to apply frames, but it also has great special effects that can turn photos into one-of-a-kind
images. Both of these programs were used to frame the images in this review. Alien Skin Software is now including
a copy of Paint Shop Pro 4.14 with its Eye Candy program, another plug-in. You can then purchase the upgraded version
of Paint Shop Pro for a reduced price.
Image Capture--takes a "snapshot" of your entire screen, client area,
a window, an object or any area that you select. You can screen capture with a right mouse click, or with a hot
key combination. You can then edit the screen shot right in Paint Shop Pro.
|
 oftware's
Paint Shop Pro is an image creation, viewing and manipulation program.
With Version 5.0, Jasc took its product from shareware to retail. Shareware
products are only available from the Web, not from stores. You can still
get Jasc's offer to
oftware's
Paint Shop Pro is an image creation, viewing and manipulation program.
With Version 5.0, Jasc took its product from shareware to retail. Shareware
products are only available from the Web, not from stores. You can still
get Jasc's offer to  try-before-you-buy
version from their Web site, though. Paint Shop Pro is designed for home
users who want to retouch and edit photos (turn your photos into button
images and your animals into cartoon figures) that can then be used in
cards, calendars, or even sent electronically to friends; business users
who need to create images for fliers, brochures, and newsletters; Web
designers who want to create images that will make their Web site stand
out; and digital photographers who have need of a professional package
that provides photography and retouching tools to manipulate exposure
levels, retouch, enhance, contrast, crop, or resize any image. The program
can also be used to build digital photo archives. Version 5.01 is an upgrade
with some additional features and enhancements from 5.0, but the major
changes were from from Version 4 to 5. The price is $99.00. Upgrades are
$39.00. Jasc Web site is: http://www.jasc.com
try-before-you-buy
version from their Web site, though. Paint Shop Pro is designed for home
users who want to retouch and edit photos (turn your photos into button
images and your animals into cartoon figures) that can then be used in
cards, calendars, or even sent electronically to friends; business users
who need to create images for fliers, brochures, and newsletters; Web
designers who want to create images that will make their Web site stand
out; and digital photographers who have need of a professional package
that provides photography and retouching tools to manipulate exposure
levels, retouch, enhance, contrast, crop, or resize any image. The program
can also be used to build digital photo archives. Version 5.01 is an upgrade
with some additional features and enhancements from 5.0, but the major
changes were from from Version 4 to 5. The price is $99.00. Upgrades are
$39.00. Jasc Web site is: http://www.jasc.com age is very complete
and includes tutorials. Jasc Software has additional tutorials on their
Web site. This is a very popular program that has a wide variety of users
who want to share their information, so for those of you who really want
to delve into Paint Shop Pro, there are many, many third-party tutorial
sites on the Web that explain, step-by-step how to use the program. These
tutorials range from teaching you how to use the basic features of the
program to more advanced techniques of creating and using masks. You can
read them on-line and/or print them for later use. I used a tutorial from
the Web for the gold section headings. Some parties even let you download
the images they have used in their tutorials to make it easier to follow
the tutorials. Jasc Software conveniently provides links to these third-party
sites for you. http://www.jasc.com/tsites.html
The numerous users groups are also helpful for solving problems. Intermediate
and advanced PC users will welcome the new features such as the layers
palette and digital camera support that make this program a very professional
package at a fraction of the price of other similar programs. You can
create a true layered graphical image.
age is very complete
and includes tutorials. Jasc Software has additional tutorials on their
Web site. This is a very popular program that has a wide variety of users
who want to share their information, so for those of you who really want
to delve into Paint Shop Pro, there are many, many third-party tutorial
sites on the Web that explain, step-by-step how to use the program. These
tutorials range from teaching you how to use the basic features of the
program to more advanced techniques of creating and using masks. You can
read them on-line and/or print them for later use. I used a tutorial from
the Web for the gold section headings. Some parties even let you download
the images they have used in their tutorials to make it easier to follow
the tutorials. Jasc Software conveniently provides links to these third-party
sites for you. http://www.jasc.com/tsites.html
The numerous users groups are also helpful for solving problems. Intermediate
and advanced PC users will welcome the new features such as the layers
palette and digital camera support that make this program a very professional
package at a fraction of the price of other similar programs. You can
create a true layered graphical image.