Start with a Scan"Turn Your Scanned Images Into Artwork" |
||
Click on a thumbnail to enlarge it. Use your browser's "BACK" button to return to this review when done. |
||
| Title: Start with a Scan Author: Janet Ashford and John Odam Publisher: Peachpit Press http://www.peachpit.com Publication Date: 1996 Pages:144 ISBN: 0-201-88456-9 Price: $34.95  Start
with a Scan is a visual, step-by-step guide which shows you
how to transform raw scanned images into good-looking finished illustrations.
The book includes three chapters on the technical basics of scanning.
But the bulk of the book is devoted to showing you how to start with a
scan of almost anything (a lackluster photo, a clip art engraving, a household
object) and use either image-editing or PostScript illustration software
to turn it into an original, high-quality piece of art. Each chapter includes
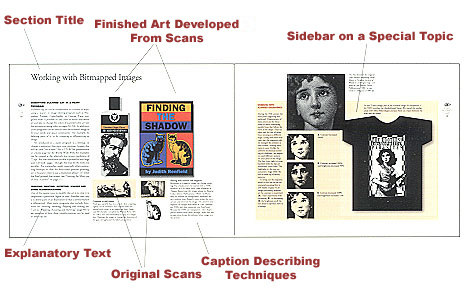
color and black-and-white graphics, clearly written text, captions with
how-to details, sidebars on special topics, and occasional quotes on related
ideas. It is appropriate for either PC or Macintosh users. There are not
click and drag instructions for every technique because the authors wanted
the book to be applicable for a variety of different software programs,
versions, and computers. But there is enough detail that you can translate
from the system that the authors are using to others. Photoshop-specific
features are referred to quite often, but other image-editing programs
include similar functions. Start
with a Scan is a visual, step-by-step guide which shows you
how to transform raw scanned images into good-looking finished illustrations.
The book includes three chapters on the technical basics of scanning.
But the bulk of the book is devoted to showing you how to start with a
scan of almost anything (a lackluster photo, a clip art engraving, a household
object) and use either image-editing or PostScript illustration software
to turn it into an original, high-quality piece of art. Each chapter includes
color and black-and-white graphics, clearly written text, captions with
how-to details, sidebars on special topics, and occasional quotes on related
ideas. It is appropriate for either PC or Macintosh users. There are not
click and drag instructions for every technique because the authors wanted
the book to be applicable for a variety of different software programs,
versions, and computers. But there is enough detail that you can translate
from the system that the authors are using to others. Photoshop-specific
features are referred to quite often, but other image-editing programs
include similar functions. |
||
| Beginning, Intermediate, and Advanced computer users. Just about anyone could gain from reading this book. Design students and people who are new to the computer graphics field and want to know what can be done with scanning will come away with a wealth of ideas. It is also perfect for experienced designers and illustrators who work with computer graphics every day and are always looking for new ideas and techniques to stimulate their imaginations and broaden their repertoire. | ||
|
The content of Start with a Scan is organized into 13 chapters. All of the scanned images in this review are from the book and should give you an indication of the richness of the book.
Chapter 2: Working with Scanners--discusses different types of scanners as well as digital cameras, still video, and video frame grabbers.
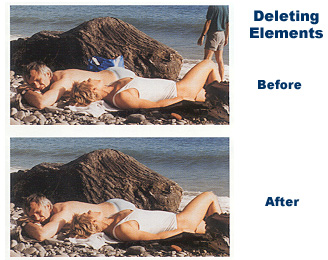
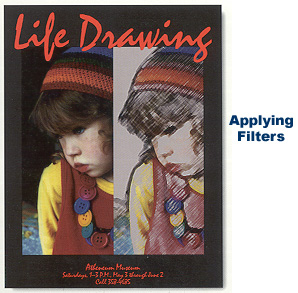
Chapter 8: Working with Scanned Photographs--various
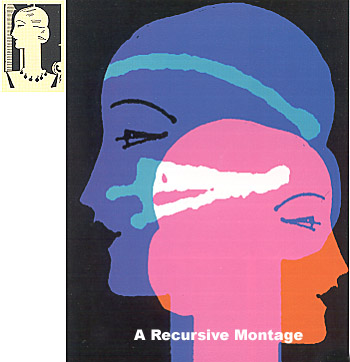
ways of altering and enhancing Chapter 9: Transforming Photos into Graphics--how
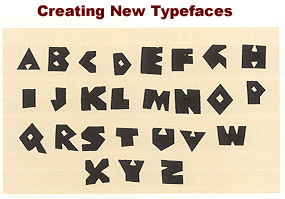
to use bitmapped or PostScript effects on Chapter 10: Creating Type Treatments--discusses
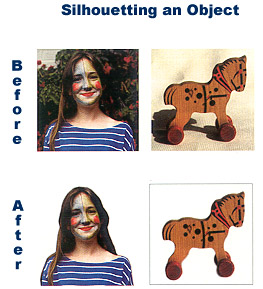
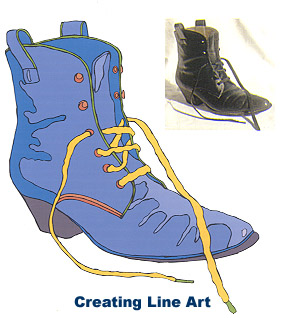
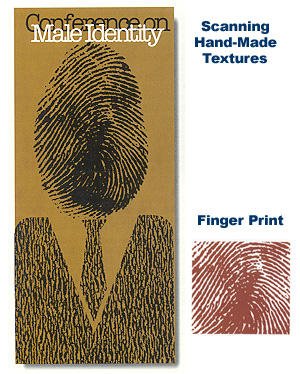
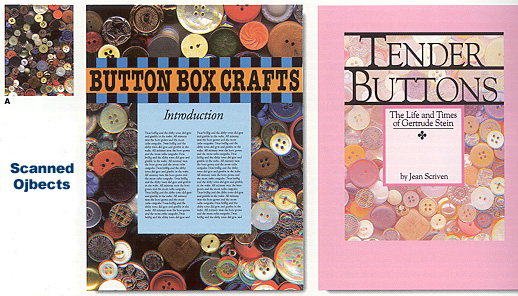
type from historical sources and converting Chapter 11: Scanning Real Objects--gives
you tips on scanning real objects and Chapter 12: Creating 3D Illustrations--creative
ideas on extruding scans in 3D. Examples are Chapter 13: Multimedia Projects--learn to design for the screen and multimedia. Resolution, screen size, and color depth are looked at. There is a section on creating screens for CD-ROMs; creating graphics for the Web; and creating graphics for animation. |
||
| Start with a Scan is one of my favorite inspirational books. Its large 8-1/2 by 11 inch format makes it easy to read, and it is visually stunning, with each page filled with color images. I especially like the timeless quality of the book. As it is not specific to one program or version, you don't have to run out every year to buy an update when a new version of a program comes out. You can tell the authors love their work and want to share their enthusiasm with others. It truly shows you how to turn scanning into an artform. | ||
|
Graphics:
CorelDraw & Adobe Photoshop |
||
|
|
||