Macromedia
FreeHand 10:
Training From the Source
"Learn
Freehand Tools with Step-by-Step Lessons
and Create Real-World Graphic Design Projects!"
Title:
Macromedia
Freehand 10: Training From the Source
Author:
Tony Roame and Subir Choudhury
Publisher:
Peachpit Press http://www.peachpit.com
Publication Date: June
2001
Pages: 472
with CD
ISBN: 0-201-75042-2
Price:
$44.99
Macromedia Freehand 10: Training From the Source shows Web and print designers how to create illustrations using Freehand. Freehand is a powerful and comprehensive drawing and layout program that provides a complete set of tools for creating dynamic graphics, illustrations, and page designs for print, multimedia, and internet publishing projects. The accompany CD-ROM contains files for lessons, as well as finished projects. Lessons are accompanied by black and white illustrations and screen shots on every page. The lessons in this book take you step by step through a series of real-world graphic design projects, from basic shape creation and manipulation to multi-page document formatting to advanced effects and animation. Through the over 14 hours of training, you'll gain the knowledge and confidence to explore and realize your own design ideas with Freehand. Appropriate for PC and Macintosh users.
You learn how to:
- Create vibrant object-based graphics for print and the Web;
- Work with paths and points to achieve organic shapes;
- Combine and manipulate text and graphics for complex multi-page layouts;
- Use master pages, customizable text styles, layers, and other time-saving features for ease, consistency, and consolidation;
- Apply transparency controls to layered graphics;
- Create custom colors and gradients;
- Know when not to start from scratch--let FreeHand's tools create illustrations for you;
- Create animations and apply links or Flash actions to objects for use in Flash or on the Web.
Macromedia Freehand 10: Training From the Source is divided into an Introduction, 10 chapters or lessons, and an appendix. Each lesson begins with an overview of the lesson's content and learning objectives, and each is divided into short tasks that break the skills into bite-size units.
Introduction--describes the lessons, what you will learn, and the system requirements.


Chapters 1 through 10 cover the following:
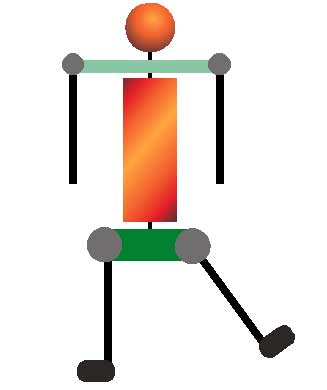
- Chapter 1: Freehand Basics: A Quick Tour--You draw a simple robot using graphic objects created by FreeHand's basic shape tools, including rectangle, ellipse, and line. You also use the pointer tool to select and move graphic objects. In this lesson, you will learn to: Create a new document; Identify and organize tools and controls; Customize application settings; Create basic shapes such as rectangles, ellipses, and lines; Change the appearance of objects by adding color and changing line thickness; Group and align objects; Create additional copies of existing elements; Create a mirror image of an element or group; and Rotate elements on the page. See first image to the left for a view of the finished file.
- Chapter 2: Combining Text and Graphics--You set up a document with multiple pages, and then combine graphic elements with text for a compelling corporate identity package. In this lesson, you will learn to: Add pages to a document; Arrange pages on the pasteboard; Set a custom page size; Specify measurement units; Design the layout for printing with two ink colors; Import a vector EPS file created elsewhere; Change the appearance of objects; Practice aligning elements; Import text from an outside file; and Enter and format text.
- Chapter 3: Working with Paths and Points--In the first part of this lesson, you experiment with basic shapes, the freeform tool, and tracing templates to learn how to create and modify paths and points. Then you apply these skills by tracing a template to create a car. In this lesson, you will learn to: Manipulate basic shapes with the freeform tool; Learn the fundamental principles of points and paths; Create and modify paths to create objects of any shape; Copy artwork into existing documents; Create gradient-filled text; and Apply a border to text. See second image to the left for a view of the finished file.
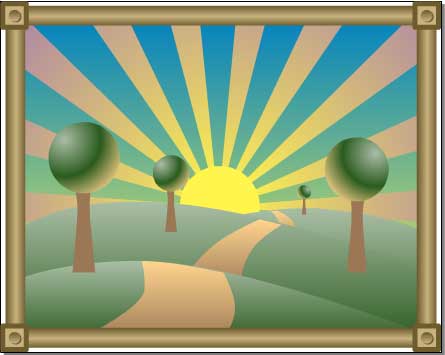
- Chapter 4: Using Layers and Styles--You apply Layers and Styles to the creation of a stylized drawing of sunbeams radiating above a hillside. You use the pen tool, perform and duplicate transformations, work with layers and styles, apply path operations, and use the powerful Paste Inside command. You also export your artwork so it can be imported into other applications. In this lesson, you will learn to: Import tracing patters to help you accurately create paths and elements; Organize a document into layers; Create paths with the pen tool; Create and duplicate transformations; Create an object style so you can easily apply and modify visual characteristics; Trim unwanted portions from graphics; Import another Freehand document; and Export artwork. See third image to the left for a view of the finished file.
- Chapter 5: Creating More Complex Art--You manipulate and distort existing artwork to create perspective and/or conform to specific dimensions. In this lesson, you will learn to: Use Xtra path operations, including union, punch, and inset path; Use Freehand to perform math calculations in panel fields; Assign graphic styles to objects; Attach text to paths; Blend gradient fills; Attach blends to paths; Import artwork from other Freehand files; Set up the perspective grid options; Manipulate the perspective grid on your page; Apply artwork to the perspective grid; Automatically trace imported images; and Use the envelope feature to distort artwork. See fourth image to the left for a view of the finished file.
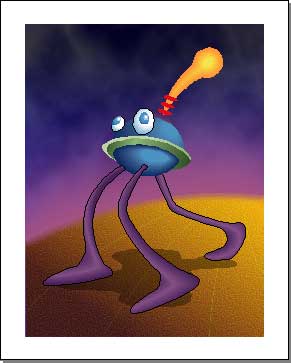
- Chapter 6: Blending Shapes for Shading--You complete a robot illustration for a postcard by applying skills you learned in previous lessons to add the fills and shading needed to finish the robot. In this lesson, you will learn to: Create blends for shading; Paste blends inside paths; Move copies of artwork into different documents; Apply gradient fills; Apply a lens fill; Create a custom page size; Import an image; and Customize your working environment. See last image to the left for a view of the finished file.
- Chapter 7: Page Layout in FreeHand--You create a one-page ad designed to go in a magazine. In this lesson, you will learn to: Import text from an external source; Toggle text blocks between fixed width and auto-expand; Control the size and position of text blocks; Create multicolumn text blocks; Import vector objects from an external file; Create text runaround for imported objects; and Export a document as a PDF file.
- Chapter 8: Multiple-Page Documents--You construct a three-page catalog insert for a real estate company. In this lesson, you will learn to: Add new page sizes to the Document Inspector; Add and edit ruler guides; Create path guides; Create custom process colors; Blend gradient fills; Import text into a layout: Flow text from one page to another; Format text using styles; Use Xtra tools and path operations; Wrap text around graphics; Use and edit custom text effects; Copy colors from imported images for use elsewhere in the document; Create and apply a master page; Print a document; Specify a print area; and Prepare files for a commercial printer.
- Chapter 9: Setting Up Animation--You create an animation in Freehand and export it as a SWF file. In this lesson, you will learn to: Create blends that are designed for motion: Animate text in a variety of ways; Release blends to layers; Use a variety of animation techniques; Use the fisheye lens tool for 3D animation; Use various export settings; Export a document as a SWF file; and Add Flash actions to a Freehand document.
- Chapter 10: Web Site Storyboards--You learn how to use Freehand to assemble a Web site storyboard, carry out creative concepts, export the results as a PDF or HTML file for client review, and export as a SWF file for editing in Flash. In this lesson, you will learn to: Create symbols in Freehand for repeating elements; Use symbols for repeating elements; Edit and replace existing symbols; Use a symbol as a brush stroke; Add names and notes to objects; Edit text styles to update multiple pages simultaneously; Use Find and Replace Graphics to substitute elements and explore design concepts; Use the Magnify lens fill to create master elements; Duplicate single pages and groups of pages to expedite design; Assign Web links and add names and notes to objects using the Navigation panel; and Export a Freehand document as a PDF, HTML, and SWF document.
- Appendix A: Windows Shortcuts: A quick reference to the default shortcuts in Freehand for Windows computers.
- Appendix B: Macintosh Shortcuts: A quick reference to the default shortcuts in Freehand for Macintosh computers.
For running Macromedia Freehand 10, you need:
PC:
- 120 MHz Intel Pentium processor or higher;
- Windows 95, 98, 2000, or NT 4 (with Service Pack 3) or later;
- 64 MB of application RAM;
- 50 MB available disk space (70 MB or more recommended);
- CD-ROM drive;
- 800x600 color monitor;
- PostScript printer (recommended);
- For Lesson 10 only, a Web browser.
Mac:
- Power PC processor;
- Mac OS 8.1 or later;
- 32 MB of application RAM (64 MB or more recommended);
- 50 MB available disk space (70 MB or more recommended);
- CD-ROM drive;
- 800x600 color monitor;
- PostScript printer (recommended);
- For Lesson 10 only, a Web browser.
Web Page Design: Macromedia Dreamweaver 4.0
| Educational | Books | Utilities | Web Tools | Legal | Articles