The Scene. A CorelDream 3D document
is called a scene. A scene is the  collection
of objects, light sources, and cameras, saved in a single file. Each
new scene has two windows: the Perspective window and the Hierarchy
window. When you have saved a scene, its filename appears in the title
bars of the Perspective and Hierarchy windows. The coffee scene to
the right was created using the Scene Wizard in CorelDream.
collection
of objects, light sources, and cameras, saved in a single file. Each
new scene has two windows: the Perspective window and the Hierarchy
window. When you have saved a scene, its filename appears in the title
bars of the Perspective and Hierarchy windows. The coffee scene to
the right was created using the Scene Wizard in CorelDream.
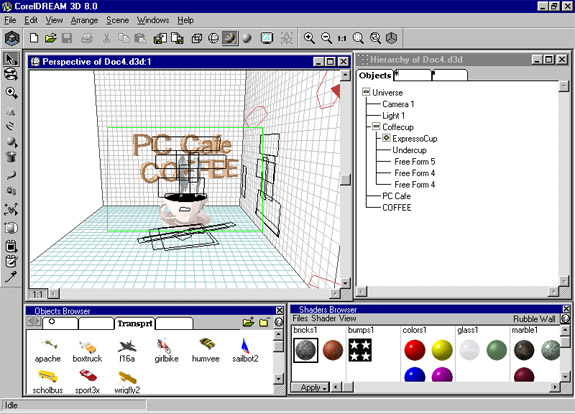
Windows. When opening an application
for the first time, you see four wind ows:
Perspective window (upper left), Hierarchy window (upper right), Objects
browser (lower left), and Shaders browser (lower right). These are
the primary work windows. To display one of the windows, choose it
from the Windows menu.
ows:
Perspective window (upper left), Hierarchy window (upper right), Objects
browser (lower left), and Shaders browser (lower right). These are
the primary work windows. To display one of the windows, choose it
from the Windows menu.
Workspace Preferences. Windows can be resized as you work. You can also
move them around your screen and customize your workspace. When you quit the application, CorelDream 3D remembers
your settings and uses them the next time you launch the application. You can save different workspace layouts
in configuration profiles that you can load at any time.
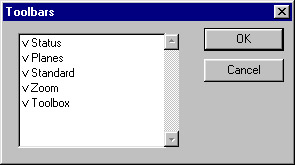
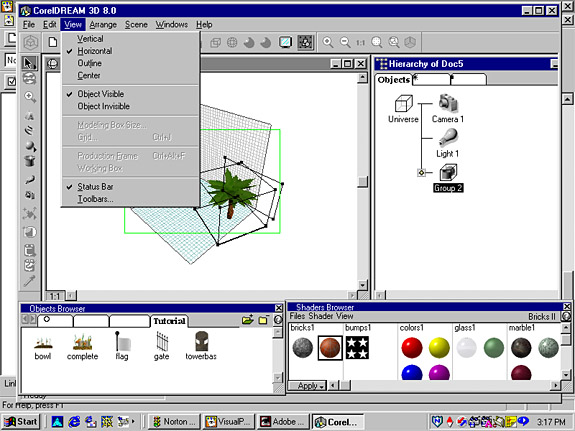
Toolbars. You can choose which
toolbars you want to see in your workspace and configure them as
you want. Toolbars are: Standard, Toolbox (Perspective or Modeler),
or Zoom. The Toolbox is the 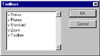 Perspective
Toolbox when you work in the Perspective window and the Modeler
Toolbox when you work in the Modeling window. The Standard toolbar
appears at the top of the window, and the Perspective/Modeler toolbar
appears on the left. These are floating toolbars; therefore you
can move them whenever you like. You can even change the shape of
a toolbar by dragging a corner or edge. you can redock a toolbar
anywhere on your screen.
Perspective
Toolbox when you work in the Perspective window and the Modeler
Toolbox when you work in the Modeling window. The Standard toolbar
appears at the top of the window, and the Perspective/Modeler toolbar
appears on the left. These are floating toolbars; therefore you
can move them whenever you like. You can even change the shape of
a toolbar by dragging a corner or edge. you can redock a toolbar
anywhere on your screen.
Perspective Window. The main
window in CorelDream 3D is called the Perspective window, and it shows
a view of the 3D workspace, where objects are created and arranged
in three dimensions to create a scene. The workspace itself is calle d the universe. Objects are 3D volumes
or other items, such as lights and cameras, within the universe. The
view of your scene shown in the Perspective window is taken through
a camera. If you want, you can position other cameras to get different
viewpoints of the scene, and you can open multiple Perspective windows
to view your scene from many viewpoints at once. The image to the
right is an example of what you can create in the program using the
Scene Wizard.
d the universe. Objects are 3D volumes
or other items, such as lights and cameras, within the universe. The
view of your scene shown in the Perspective window is taken through
a camera. If you want, you can position other cameras to get different
viewpoints of the scene, and you can open multiple Perspective windows
to view your scene from many viewpoints at once. The image to the
right is an example of what you can create in the program using the
Scene Wizard.
Objects, lights, and cameras are arranged in the main Perspective
window so you can set up scenes. The Edit Object commands are used
to work on selected it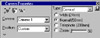 ems up close. To create or edit an object,
you use the Modeling window. When you open objects for modeling, the
Perspective window will "zoom in" on the object (to the
exclusion of other objects) and transforms itself into the Modeling
window. The Main menu then changes to the Modeling menu, and the Perspective
Toolbox changes to the Modeler Toolbox with the Drawing and Text tools.
ems up close. To create or edit an object,
you use the Modeling window. When you open objects for modeling, the
Perspective window will "zoom in" on the object (to the
exclusion of other objects) and transforms itself into the Modeling
window. The Main menu then changes to the Modeling menu, and the Perspective
Toolbox changes to the Modeler Toolbox with the Drawing and Text tools.
The Working box, which is represented by three intersecting planes, is the primary element of the Perspective
window. This Working box provides a framework that guides you as you work in a 3D universe with 2D devices the
mouse and monitor.
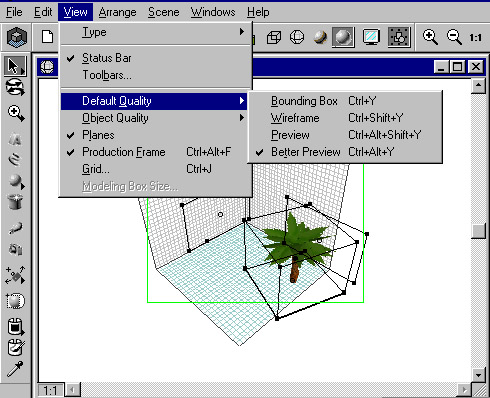
Each plane of the Working box has a grid. You can turn the display
of the three grids on or off by using the Plane Display tool to the
left of the Perspective window. The gr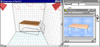 id representing
the active plane is shown in blue-green on the screen. When moving
an object in the Perspective window, movement follows the currently
active plane. When the Perspective window is active, a specific set
of tools is available. The current zoom ratio is shown in the lower
left of the window. The status (idle, drawing, shading, etc.) of the
application is displayed in the Status Bar. The image to the left
shows the grid for the table scene.
id representing
the active plane is shown in blue-green on the screen. When moving
an object in the Perspective window, movement follows the currently
active plane. When the Perspective window is active, a specific set
of tools is available. The current zoom ratio is shown in the lower
left of the window. The status (idle, drawing, shading, etc.) of the
application is displayed in the Status Bar. The image to the left
shows the grid for the table scene.
The Perspective window has five modes to display your objects: No
Preview; Bounding Box; Wireframe; Preview; and Better Preview. The
Better Prev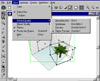 iew mode will show you details of the shape and color
of your objects, but it does take longer to calculate and draw. To
increase application efficiency, you can work in Wireframe or Preview
mode at the beginning of your project. When you become more familiar
with the program, you can switch to Better Preview mode as specific
details become important.
iew mode will show you details of the shape and color
of your objects, but it does take longer to calculate and draw. To
increase application efficiency, you can work in Wireframe or Preview
mode at the beginning of your project. When you become more familiar
with the program, you can switch to Better Preview mode as specific
details become important.
Objects Browser. The Objects browser is a visual catalog of 3D objects that
you can drag into your Perspective or Hierarchy windows. This browser will display all CorelDream 3D files that
are located in the directories loaded into the browser. Also, you can have multiple directories open in the Objects
browser.
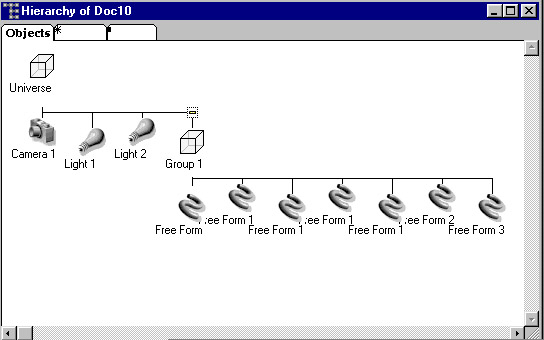
Hierarchy Window. You manage the
contents of your workspace with the Hierarchy window. You can view
the hierarchy in Vertical, Horizontal, or Outline views. You can work
without using the Hierarchy window, but you will find it increasingly
valuable as you develop more complex scenes. The Hierarchy w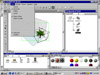 indow
gives you information on the scene's construction that is not immediately
apparent in the Perspective window. It can show how several elements
are grouped. The Perspective and Hierarchy windows are synchronized:
as you add or remove objects from one, the display in the other updates
automatically. The Hierarchy window gives you a logical (as opposed
to visual) representation of the scene. All objects, cameras, and
lights that you bring into the universe are represented by icons in
the Objects panel of the Hierarchy window. The image to the right
uses a Horizontal view. The image under the Interface section uses
an Outline view.
indow
gives you information on the scene's construction that is not immediately
apparent in the Perspective window. It can show how several elements
are grouped. The Perspective and Hierarchy windows are synchronized:
as you add or remove objects from one, the display in the other updates
automatically. The Hierarchy window gives you a logical (as opposed
to visual) representation of the scene. All objects, cameras, and
lights that you bring into the universe are represented by icons in
the Objects panel of the Hierarchy window. The image to the right
uses a Horizontal view. The image under the Interface section uses
an Outline view.
The Hierarchy window is organized into three separate panels: Objects,
Masters, and Effects. Using the tabs at the top of the window you
can switch between panels. The Objects panel displays all objects
in your scene. The Masters panel displays only  Master
objects. You use the Masters panel to manage multiple copies of a
single
Master
objects. You use the Masters panel to manage multiple copies of a
single 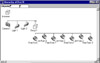 object. When you
duplicate a single object you create a class of objects that are linked
to the master object. To edit an individual copy, select the copy
in the Objects panel. To make a change to all the copies of the object,
select the Master object in the Masters panel. The Effects panel shows
any Rendering Effects that you've added. The image on the left shows
the Objects panel for the balloon image to the right.
object. When you
duplicate a single object you create a class of objects that are linked
to the master object. To edit an individual copy, select the copy
in the Objects panel. To make a change to all the copies of the object,
select the Master object in the Masters panel. The Effects panel shows
any Rendering Effects that you've added. The image on the left shows
the Objects panel for the balloon image to the right.
Shaders Browser. The Shaders browser provides an easily accessible catalog
of color, texture, and other surface characteristics that you can apply to your objects. Each of these shaders
includes various channels: color, reflection, highlights, shininess, transparency, refraction, bumps, and glow.
Shaders can be applied individually or collectively. Objects can be shaded by dragging the desired shader from
the browser and dropping it onto the object. You can create your own shaders and add them to the Shaders browser
to make them always available.
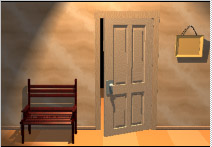
CorelDream is based on Ray Dream Designer 4. It is a program that is well-suited for graphic design and is a
good introduction to 3D. Thinking and designing in 3D is not easy. The Scene Wizard is a great tool for beginners
to get a feel of working with scenes.