 |
|
|
Alien
Skin Eye Candy 4000
"Great
Special Effects!"
|
 |
|
|
|
|
|
|
|
|
|
|
|
|
| |
|
|
|
|
|
|
|
For
those aficionados of special effect filters, you won't be disappointed
with the new Eye Candy 4000, the major upgrade of Alien Skin's popular
Eye Candy 3. This easy to use plug-in allows you to get high-quality and
professional results without having to be a graphic guru, or spend zillions
of hours learning a new program. It gives you 23 filters, some outrageous,
some practical, and and it works within a variety of packages: Adobe Photoshop
4, ImageReady 1, Macromedia Fireworks 2, Deneba Canvas 6, Corel Photo-Paint
8, Jasc Paint Shop Pro 5, and later versions of each. If you feel filter-impaired,
are not familiar with Eye Candy because you don't have a filter-obsessive
personality, but would like some background, here goes. The program's
coming out party (for Macintosh only) was in 1994, under the name of The
Black Box, which included the first commercially sold drop shadow filter.
Corel came to the rescue of Windows users and licensed the Glass, Swirl,
and Boss filters for Corel PhotoPaint 5.0. In 1997, the program got a
new name, Eye Candy 3 and acquired a cross-platform personality. The change
in Eye Candy 4000 is even more significant. It's had an interface lift
(tight, powerful, and compact); a variety of new features have been added;
several filters have been combined and enhanced; and there is the addition
of five new effects: Marble, Wood, Drip, Melt, and Corona. You don't need
Eye Candy 3 to use the new version, and every one of the old Eye Candy
3 filters is present in Eye Candy 4000. The program is available for PCs
and Macs. Price: $169; Upgrades $69. Academic pricing is also available.
Alien Skin Software has other unique programs such as Xenofex, another
set of filters. The Alien Skin Web site is worth visiting. http://www.alienskin.com
|
| |
|
|
|
 |
|
|
Intermediate Beginners, Intermediate, and Advanced
computer users. Users should have a basic understanding of the
graphics programs they will use Eye Candy in, but the plug-in can be used
by both novice and professional designers. It is simple to use, but robust
enough for any pro. Novices can use the presets to instantly create special
effects and wow their friends; and web, game, and multimedia designers who
like to customize, can use the sliders or numeric values to create seamless
textures, dazzling buttons, and text effects. |
| |
|
|
|
 |
|
|
Features
in Eye Candy 4000 include:
- 23
sophisticated special effects filters
- 5
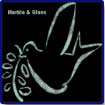
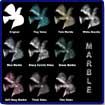
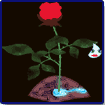
new filters: Marble (image to left), Wood, Drip, Melt, Corona
- Simple,
friendly interface with clear, understandable controls
- Bevel
Profile and Color Gradient Editors
- Seamless
tiling for all texture effects
- Unlimited
"undo" and "redo" in every filter window
- Settings
are now tradable via e-mail--and across platforms
- Hundreds
of presets create sophisticated effects instantly
- Huge
preview window allows users to see underlying layers
- Command
menus allow users to switch filters from within the preview window
- Sliders
now use real-world parameter units to create effects that are resolution-independent
- Keyboard
shortcuts identical to those in Photoshop
- Mouseover
help strings for all controls
- Important
reworkings of previous Eye Candy 3 filters
- Filters
work as Live Effects in Macromedia Fireworks 3 and Deneba Canvas 7.
|
| |
|
|
|
 |
|
Manual
and Installation |
 |
|
|
 |
|
|
The
installation is quick and easy. The manual is a welcome addition. All
of the filters are discussed and there are examples of each one. A flip-book
is included throughout the manual so that the pictures at the bottom right
of odd-numbered pages will do interesting things as you flip through.
Also, each opening filter page includes a fun tidbit of information related
to that filter name.
|
|
|
|
New
Look and Features |
 |
|
|
 |
|
|
The
improvements to the interface have been well-thought out. You have more
options, but the workspace is not cluttered, and the program is still
easy to learn and use. Below is a look at some of the new features and
options, followed by a view and discussion of each filter.
|
 |
| Huge
Preview
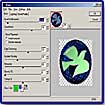
with Underlying Layers Visible--The
first thing you will notice when using the plug-in is that the preview window
is now full size, as well as being resizable. You just click and drag on
the bottom right-hand corner of the filter window to change the size. There
is also a "Show All Layers" command from the View menu that allows
you to preview the effect with all layers in the image visible, which is
useful for seeing how a filter will look on one layer in relationship to
the whole image. |
 |
| Menus
from the Filter Window--Next,
you will see that menus have been added to the preview window of each filter.
Macintosh users will see the menus in place of their usual Menu bar, and
Windows users will see the menus at the top of the filter preview window.
Options on the Menu bar are: Edit, Filters, View, Settings, and Help. Having
all your common file commands and all the filters right at your fingertips
in the Menu bar, is extremely efficient and functionable. You save time
viewing the effects of filters because you don't have to leave the program
to apply and view different filters. |
 |
| Settings
Now in "Settings" Menu and Tradable Via E-mail--The
Settings menu in each filter window allows you to save and manage the presets
that are included with each filter. You can name and save favorite settings,
edit the presets, reset a filter to factory default settings, and even trade
settings via e-mail, which are usable across both Mac and Windows platforms. |
 |
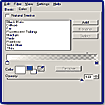
| Lighting,
Color, and Bevel Profile Tabs--You
will also notice that Eye Candy has incorporated an industry-standard feature
of tabs. When a filter has various controls, two or three tabs will be visible
beneath the Filter menu list to help organize them. Such tabs are: Basic,
Lighting, Color, and Bevel Profile. Also the Wood filter has Knots and Grain
tabs. |
 |
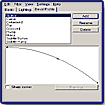
| Bevel
Profile Editor and Color Gradient Editor--A
Bevel Profile Editor is now included in Bevel Boss, Chrome and Glass, which
gives you control over the shape of the bevel and carve effects. The settings
can be named and saved for later use, plus there are more presets within
the editor. A new Color Gradient Editor included in Fire, Gradient Glow,
Smoke, and Star allows you to control the color and opacity of each color
stop in the gradient, which is great for producing multi-hued glows, halos,
and rainbows. An eyedropper tool lets you quickly select any color in the
preview window. |
 |
|
Real-World
Absolute Parameter Units
(Photoshop Only)--An important improvement
that isn't immediately apparent when you open the plug-in, is the ability
to specify absolute units for your settings, which allows you to create
effects that are resolution-independent. This is a great asset for designers
who create for both print and the web. Slider parameters are now based
on the measurement unit you have selected in Photoshop (inches, centimeters,
percentage, etc.). If you use the percentage option, an effect will appear
the same whether saved at 300 dpi for print or 72 dpi for web applications.
You can work with proofs at screen resolution, save the settings, and
then apply them to higher-resolution images when you are ready to print.
This saves you time because you don't have to recreate the effect for
different outputs, and it's more efficient for users with slower machines
and less RAM to work with lower resolution proofs.
|
 |
|
Unlimited
Undo--For
those indecisive, perfection-obsessive users, you now have unlimited Undo
and Redo capability within the preview window of each filter. You don't
have to make an immediate decision; you can sit there and undo, redo,
undo until you are satisfied.
|
 |
| Seamless
Tiling--For
designers who need to quickly create professional textured backgrounds for
web pages, games or multimedia presentations, this feature is wonderful.
Just by checking a box, you can now create seamless tiles in the Fur, HSB
Noise, Jiggle, Marble, Swirl, Water Drops and Wood filters. |
 |
| In-Preview
Controls--New
controls have been added inside the preview window in Shadowlab and Star.
These controls are enabled by clicking the arrow tool in those filters,
and they give you direct control over the position, size, and shape of the
effect. |
 |
| |
Filters
Work as "Live Effects" in Fireworks and Canvas--If
you use Macromedia's Fireworks or Deneba's Canvas, you will love the ability
to apply filters as dynamic or live effects. Applying a filter as a live
effect means that you can apply the filters to artwork in such a way that
whenever the artwork is revised the filters will automatically update to
match the revision. The applied effects are also completely editable, and
favorite settings can be saved and applied to other objects. |
 |
| |
Mouseover
Help Strings & Keyboard Shortcuts--You
can now view help strings for elements in the preview window as you pass
your cursor over them, which is a great help for beginners. Also, wherever
possible, there are keyboard shortcuts identical to those used in Photoshop. |
|
|
|
Filters |
|
|
|
|
|
|
|
|
Below
is a discussion of the filters, all 23. The manual suggests that, whenever
possible, you should apply filters to elements in a layer instead of using
the selection tool. Using the selection tool in many programs can leave
a visible fringe around the selection. So, I used layers when creating some
of the examples, but then used selections for others, when it seemed appropriate.
I found using the Squint filter to selections after the other filters also
helped reduce any unwanted halo. I also tried to apply filters to different
types of graphics: transparent, eps, photos, clipart, small, large, etc.
I especially liked using the filters on eps images or on graphics on transparent
backgrounds. |
|
|
|
Antimatter |
|
|
|
|
|
|
|
|
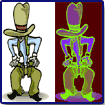
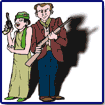
The
Antimatter filter inverts brightness without affecting hue and saturation
values. It is useful for creating a contrast effect while retaining the
current colors; for instance, you could use this filter to quickly and easily
invert a graphic for a JavaScript mouseover image. An Invert Brightness
control allows you to select the amount the brightness of the colors will
be inverted. There is also a new Decrease Saturation slider that allows
you to adjust the effect on highly compressed JPEG images. You also use
the filter on one (rather than all) of your image's RGB or CMYK color channels
to create vibrant color effects, as shown in the image to the left. The
graphic shows an original cowboy and then the cowboy with the filter applied
to just a channel. |
|
|
|
Bevel
Boss |
|
|
|
|
|
|
|
|
Inner
Bevel, Outer Bevel, and Carve have been combined into the Bevel Boss filter.
The Bevel Boss filter gives you the ability to create a variety of bevel
and carve shapes. When, I first started using the filter, I thought, "what
to do?" So many choices. There are 16 presets and then more saved profiles
under the Bevel Profile tab. You can add an embossed look to any selection,
either inside or outside the selection edges. The filter is great for quickly
creating buttons and chiseled text effects, but I wanted to do something
different. I started with just plain images on a transparent background.
By using the Bevel Boss filter in combination with other filters, I created
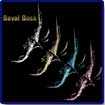
images that were certainly not plain. I used the Bevel Boss and Marble filters
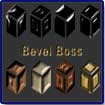
on a series of birds to create an interesting effect. I also used the Bevel
Boss and Wood filters on a series of boxes. The Bevel Boss filter worked
well on small images as well as large graphics, and is great to use in combination
with other filters for a subtle effect or an exaggerated look. |
|
|
| |
Chrome
|
|
|
|
|
|
|
|
|
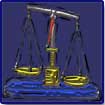
The
Chrome filter has been reworked and now uses reflection maps to create metal
effects such as gold, silver, and copper. You can create and save you own
reflection maps, which are uncompressed TIFF files that are warped around
your selection to create the reflections similar to those seen on actual
metal objects. Any uncompressed TIFF file can be used that is saved in RGB
mode. There is a Bevel Profile Editor which adds the chrome effect according
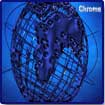
to the shape of the bevel, and there is a Lighting Tab. For the images to
the left, I used the Chrome filter on the earth graphic and then used different
chrome presets on individual sections of the scale. This filter also works
well in combination with other filters. |
|
|
|
Corona |
|
|
|
|
|
|
|
|
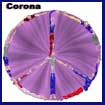
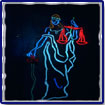
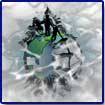
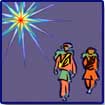
This
new filter allows you to quickly create solar flares, gaseous clouds and
other astronomical effects around any selection. For the image to the left,
I applied the Corona filter to the inside area. Then I applied the Glass
filter to the figures. |
 |
| |
Cutout |
 |
|
|
 |
|
|
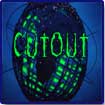
The
Cutout filter is an easy way to add shadows to make a selection appear as
a hole in an image. You have three fill options for what is seen through
the cutout effect: fill with solid color; keep original image; and make
selection transparent. You also have precise control over the distance,
blur and opacity of the shadows. This filter works well on backgrounds,
as well as text. For the image to the left, I applied the Cutout filter
to sections in the earth graphic and then applied it to the people text. |
|
|
|
Drip |
|
|
|
|
|
|
|
|
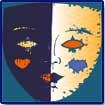
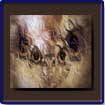
The
new Drip filter is perfect to use on either text or images to turn your
image into a dripping painting with 3D-like drops. You can control length,
thickness, spacing, taper and more. There is also a Lighting Tab. This
is a fun filter that can be used for subtle changes or drastic effects.
For the image to the left, I used the Drip filter on the left side of
the face and then used the Jiggle filter on the right side.
|
|
|
|
Fire |
|
|
|
|
|
|
|
|
The
Fire filter has been reworked to provide a more realistic flame and
fire effect. In addition, a Color Gradient Editor has been included
to allow you to choose your own color scheme. There are Side Taper and
Denser Flames sliders to make the filter more powerful. There are about
8 presets, from blue flame to meteor trail, and they can be used to
create realistic or outrageous effects. Plus, there are more presets
under the Color Tab. You have numerous options for this filter and can
get really creative. For example, for the images to the left, I used
a subtle flame effect for the top image, and then used the filter on
selections on the bottom earth image for a more dramatic effect. I sort
of went wild with the earth and also used the HSB Noise and the Smoke
effects. The Fire filter is certainly more robust in this version and
is fun to use.
|
 |
| |
Fur |
 |
|
|
 |
|
|
The
Fur filter creates a variety of fur and hair effects such as: fuzzy textures,
wavy curls, long strands, and more. There are lighting and color controls
to create realistic effects. This is another fun filter that can be used
for a variety of looks. There are about 10 presets that range from the
realistic Long & Wavy to the outrageous Blue Haired Punk, plus a seamless
tiling option. For the image to the right I played with the presets to
get an interesting effect on the owl. Then I applied the Shadowlab and
Bevel Boss filters to the rest of the image.
|
 |
| |
Glass |
 |
|
|
 |
|
|
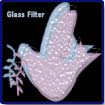
The
Glass filter is one of my favorites. It's great to use alone and in combination
with other filters (see Corona filter and Jiggle filter examples). Similar
to the Bevel Boss filter, it offers you a variety of choices. Some of
the presets are Depression-era Glass, Glass Tubing, and Surface Flaws.
You have precise control over the amount of refraction, tinting, and color.
There is also a Lighting Tab and a Bevel Profile Tab. I used the Glass
filter on the bird image to the left.
|
 |
| |
Gradient
Glow |
 |
|
|
 |
|
|
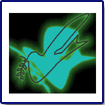
The
Glow filter is now called Gradient Glow and allows you to create a variety
of glows around the outside edge of a selection. The filter has a new Color
Gradient Editor, which provides control over the color and opacity of each
element in the glow. Some interesting presets are: Blazing Sun, Neon Outline,
and Thin Green, plus there are more presets under the Color Tab. You can
use this filter to get a variety of glow effects as seen by the examples
to the left. I used a soft glow with a medium glow width on the top bird
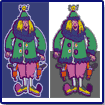
image. For the bottom image, I used the Gradient Glow filter but got a different
look by changing the color and glow width on the two clowns. With this filter,
you can create quick and easy standard glows, or you can use the control
options to get a wide range of colorful effects. |
 |
| |
HSB
Noise |
 |
|
|
 |
|
|
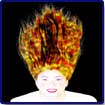
The
HSB Noise filter adds visual noise to a selection by varying hue, saturation
and brightness values. The effect can be natural or dramatic. The new Fractal
Roughness slider adds detail to the Smooth Fractal and Wrinkled Fractal
options. For a dramatic effect, I used the filter on the hair selection
in the image to the left. I like this filter and especially the Necrotic
Tissue preset. You can create surreal effects that are subtle or outrageous. |
 |
| |
Jiggle |
 |
|
|
 |
|
|
With
the Jiggle filter you can produce small jiggles or powerful distortions
based on randomly-spaced bubbling. This filter differs from the Photoshop
distortion as it is not based on a wave pattern or around a single axis.
Therefore it creates a much more organic effect that appears as if it
is bubbling, gelatinous or even shattered. There is also a seamless tiling
option. For the image to the left, I used the Jiggle filter with a small
bubble size to create just a slight jiggle on the image. Then I used the
Glass Tubing preset from the Glass filter for the edging.
|
 |
| |
Marble |
 |
|
|
 |
|
|
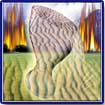
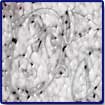
With
the Marble filter, you can create a wide range of realistic marble textures.
You have control over the color, size and shape of the rock and vein features.
It includes a seamless tiling option. This filter works well with other
filters (see Bevel Boss example and Features bird). I used the Marble
filter along with the Bevel Boss filter on the birds in the image to the
left.
|
 |
| |
Melt |
 |
|
|
 |
|
|
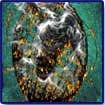
The
new Melt filter lets you turn up the heat on any image, thus stretching
and distorting it to create realistic melting effects, including the pooling
of the selection at the bottom of the melted area. The Ripple Width and
Pooling sliders give you careful control over a variety of possible distortions.
The filter works well in combination with the Drip filter. For the image
to the left, I used the Melt filter followed by the Drip filter. |
 |
| |
Motion
Trail |
 |
 |
 |
|
|
The
Motion Trail filter allows you to create the appearance of rapid movement.
It draws a trail from the selection in any direction. The filter now includes
a Taper control. I used the filter on a simple bird image to create the
illusion of flight. This filter gives you a very easy way to spice up your
graphics. |
 |
| |
Shadowlab |
 |
|
|
 |
|
|
Drop
Shadow and Perspective Shadow have been combined into a single filter
called Shadowlab. You can instantly create both drop and perspective shadows
that add a 3-D quality to your documents. You have In-Preview controls
that allow you to manipulate the size, shape and position of the shadow.
Creating a perspective is extremely easy. I used the Perspective Shadow
on the image to the left.
|
 |
| |
Smoke |
 |
|
|
 |
|
|
The
Smoke filter has been reworked to create realistic smoke, haze, fog and
fumes. A Color Gradient Editor has been added to provide a wide variety
of color choices for the effect. Turbulence Strength, Turbulence Roughness
and Side Taper sliders let you create a variety of effects. I used the Smoke
filter on the image to the left and on the example under the Fire section. |
 |
| |
Squint |
 |
|
|
 |
|
|
The
Squint filter works like the blur filters in Photoshop, but it creates a
more realistic blurring effect by spreading each pixel in a selection around
the center of a circle. Therefore, the blur closely duplicates the effect
of poor vision, an image projected out of focus or a reflection in a vibrating
mirror. You can use it to bring attention to a part of a photo by defocusing
the surrounding area. Because Squint affects transparency when it is applied
to an object in its own layer, you can get some interesting effects. For
the image to the left, I started with an eps graphic on a transparent background.
I played around with the settings to enhance transparency and then placed
the graphic on a black background to get a translucent effect. |
 |
| |
Star |
 |
|
|
 |
|
|
With
the Star filter, you can instantly create regular polygon shapes without
the need to import them from another program or use paths to approximate
them. There are In-Preview controls to alter the size, position, and orientation,
and a new Color Gradient Editor. For the image to the left, I used the Star
filter to create a variety of stars with different transparency levels.
I used the Glass filter on the two women. |
 |
| |
Swirl |
 |
|
|
 |
|
|
The
Swirl filter can be used to smear your selections using randomly-placed
whirlpools. You can use this filter to create a striking effect or just
to subtly enhance an image. There is also a seamless tiling option. For
the image to the left, I used the Swirl filter just on the background,
which had been dull and uninteresting. It enhanced the image without being
too distractive.
|
 |
| |
Water
Drops |
 |
|
|
 |
|
|
With
the Water Drops filter you can obtain a variety of realistic liquid shapes
and textures in any color, including drops, spills, and spurts. Precise
control over refraction, color, coverage, opacity and drop size is available.
A Lighting Tab gives you more options, and you can make seamless tiles.
I used the Spilled Milk preset on the image to the left. This is another
filter that works well with others. |
 |
| |
Weave |
 |
|
|
 |
|
|
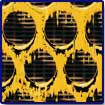
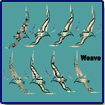
The
Weave filter recreates your selection to give it the appearance of being
woven. You have control over the size of the strips and gaps, as well as
three fill options for the weave gaps. It also includes a seamless tiling
option. This is another filter that I especially liked. I tried to use it
in a way that was different, and decided to try it on a variety of birds,
which produced the graphic to the left. This is a filter with great potential
for creating unique effects. |
 |
| |
Wood |
 |
|
|
 |
|
|
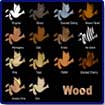
This
new filter creates a variety of wood effects. There are a variety of options
including control over the grain, knots and rings in the wood. It includes
a seamless tiling option. This filter works well in combination with other
filters (see example under the Bevel Boss section). I used the various
presets on a series of bird images for the graphic to the left.
|
| |
|
|
|
 |
 |
Eye
Candy 4000 is an excellent package, whether you are upgrading or a first-time
user.
I don't know if I have favorite filters. The more I experimented with the
program, the more I found that each one in its own way could create stunning
effects! All filters don't work well on all images. I would start to think,
"this filter is so-so, and then I would apply it to another graphic
with different settings and it would become "great." It's all
relative. It's the combination of filter, image, and settings that's important.
And some of the filters (such as the bevel boss and wood filters) really
shine when they are used in combination with other filters. For most of
the examples, I used the presets, with minor changes, to demonstrate that
you don't need to be a graphic guru to get excellent results. In reviewing
this special effects program, I looked for certain features. Is it easy
to use for beginners but robust enough for advanced users? Yes. With its
presets and intuitive interface, it's a snap to use for novices, but the
sliders and new Bevel Profile Editor and Color Gradient Editor give professionals
unlimited possibilities. Can it create stunning as well as practical effects?
Yes. Again, you can use the sliders to create subtle and realistic effects
or go wild. Do the effects work as well on text and small objects as well
as on graphics and large images. Yes. Some of the special effects programs
work well on large images, but really don't do well on text or small objects.
Eye Candy 4000 works well on both. Is it appropriate for both print and
the web? Yes. Just being able to generate resolution-independent images
is worth the upgrade price if you need to create for both outputs. The Seamless
Tiling option is a great feature for Web designers. Plus, the Bevel Boss
filter allows Web designers to quickly create button effects to apply to
JavaScript rollovers. Eye Candy 3 had a reputation as being a top-notch
special effects program. The release of Eye Candy 4000 will certainly cement
that opinion! |
| |
|
|
|
 |
 |
Windows:
- Pentium
II-class processor;
- Windows
98/NT 4/2000/Me;
- At
least 32MB of physical RAM;
- Color
monitor with 24-bit or greater video card.
Macintosh:
- PowerPC
processor;
- Macintosh
System Software 8.6 or later;
- At
least 32 MB of physical RAM;
- Color
monitor with 24-bit video card.
|
| |
|
|
|
 |
|
|
 |
|
|
 |
|
This
site is (c) Copyright 2001, by PC Cafe Online. All World Wide Rights Reserved
|
 |

