|
Interface: As PhotoTools is a plug-in,
you do not have a separate program for it, except for PhotoAnimator
which can be used as a plug-in or a stand-alone package. PhotoTools
works right in Photoshop. You can access the various PhotoTools components
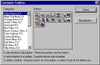
in three ways: from the  Command
Center, part of the PhotoBars; from the filter menu; or from the Extensis
menu which is added to the menus at the top of the screen.The interface
is consistent among the components with a few exceptions, and matches
the Photoshop interface as much as possible. The image to the right
shows the PhotoBars and the Extensis menu added to the Photoshop menu.
Some interface highlights are: Command
Center, part of the PhotoBars; from the filter menu; or from the Extensis
menu which is added to the menus at the top of the screen.The interface
is consistent among the components with a few exceptions, and matches
the Photoshop interface as much as possible. The image to the right
shows the PhotoBars and the Extensis menu added to the Photoshop menu.
Some interface highlights are:
- Interactive, Real-Time Previews--See the image update instantly as you adjust the sliders and controls.
- See All Of Your Layers--See all your visible Photoshop layers within a plug-in preview so you can see
how your effects will blend in with the rest of your composite image.
- Background Processing--Your effects get processed in the background as you work in the preview to maximize
performance and speed up apply times.
- Multiple Undos And Redos--You can go back and forth as many steps as you need to before applying your
effect to the image. One click on the Reset button takes you back to the beginning and resets all controls to the
defaults. You can also undo a reset.
- Put That Effect On Its Own Layer--PhotoTools allows you to create your shadow and glow effects on their
own layers for maximum flexibility and control.
- Built-in Web-Safe Color Palette--All of the effects components in PhotoTools have the "Web Safe"
color palette built-in as an instantly available pop-up menu.
- Save All of Your Effects Settings--Save any effect you create as a preset for instant and consistent
application on any other image.
- Navigator Pop-Up--The pop-up navigator is hidden until needed. Allows you to instantly position your
image in the Preview window without competing with the image for space.
- Standard Photoshop-Style Interface--You don't have to relearn tools and commands. All PhotoEffects plug-ins
use many Photoshop type commands.
- Eyedropper Tool--You can quickly choose exactly the color you want for your effects by selecting them
with an eye dropper from the background image.
Components: PhotoTools consists of ten components: a texture editor; an
animation editor; five plug-ins for effects; a button maker; a floating toolbar plug-in; and a text effect.
- PhotoTexture (New)--This plug-in is a full-featured texture
editor that lets you create natural a
 nd
synthetic textures with seamless edges. You can create textures in
three ways: (a) create a texture from scratch using the painting and
coloring tools and special Effects and Filters in PhotoTexture; (b)
specify a Photoshop image or selection area to be used as the base
for the texture; and (c) import an existing JPEG image directly into
PhotoTexture to be used as the base for a texture. nd
synthetic textures with seamless edges. You can create textures in
three ways: (a) create a texture from scratch using the painting and
coloring tools and special Effects and Filters in PhotoTexture; (b)
specify a Photoshop image or selection area to be used as the base
for the texture; and (c) import an existing JPEG image directly into
PhotoTexture to be used as the base for a texture.
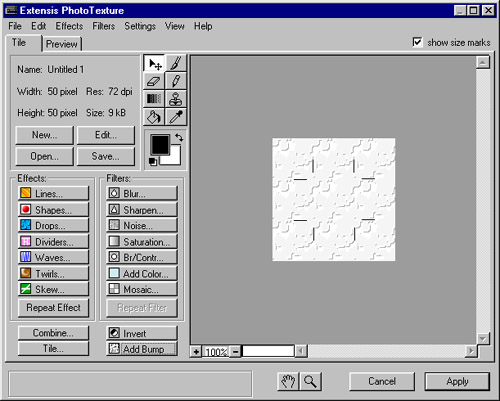
You create textures by designing a "base tile" that can
be replicated numerous times to create an overall texture effect.
As you create 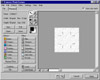 your base tile, PhotoTexture
helps you visualize your texture by displaying a 3x3 tile matrix
and replicating your base tile design over the nine tiles. The center
tile in the Drawing Area represents your base tile; it is delineated
by Size Marks in each of the four corners so you can continue to
see the base tile pattern as the texture develops. You can then
use PhotoTexture's customizable Effects and Filters to create interesting
and unique patterns. It is almost too easy. You just click away
on the different options and watch the results in the Drawing Area.
You can reapply an Effect or Filter as many times as you like and
even combine your design with previously saved textures. You can
also add additional touches to your textures with common painting
tools like Paintbrush, Paint Bucket, Pencil, and Rubber Stamp. Tile
designs are saved in two ways: (a) apply the texture to an image
or selection area in Photoshop (or to a blank Photoshop document,
if your are creating a texture from scratch); and your base tile, PhotoTexture
helps you visualize your texture by displaying a 3x3 tile matrix
and replicating your base tile design over the nine tiles. The center
tile in the Drawing Area represents your base tile; it is delineated
by Size Marks in each of the four corners so you can continue to
see the base tile pattern as the texture develops. You can then
use PhotoTexture's customizable Effects and Filters to create interesting
and unique patterns. It is almost too easy. You just click away
on the different options and watch the results in the Drawing Area.
You can reapply an Effect or Filter as many times as you like and
even combine your design with previously saved textures. You can
also add additional touches to your textures with common painting
tools like Paintbrush, Paint Bucket, Pencil, and Rubber Stamp. Tile
designs are saved in two ways: (a) apply the texture to an image
or selection area in Photoshop (or to a blank Photoshop document,
if your are creating a texture from scratch); and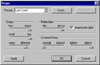 (b) save the texture directly
from Photo (b) save the texture directly
from Photo Texture
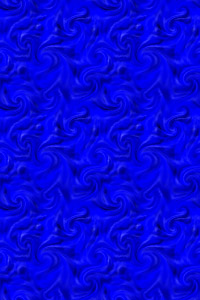
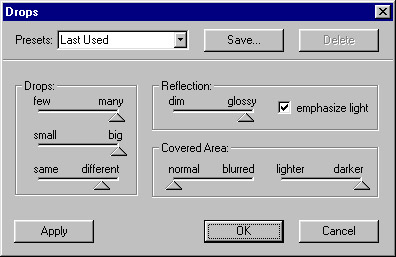
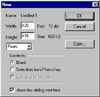
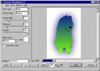
as a JPEG format file. This is an amazing plug-in. The texture possibilities
are endless because of the painting tools, effects and filters,
and options available within each effect and filter. For instance,
the image to the right shows you the options you have when you select
the drops effect. Texture
as a JPEG format file. This is an amazing plug-in. The texture possibilities
are endless because of the painting tools, effects and filters,
and options available within each effect and filter. For instance,
the image to the right shows you the options you have when you select
the drops effect.
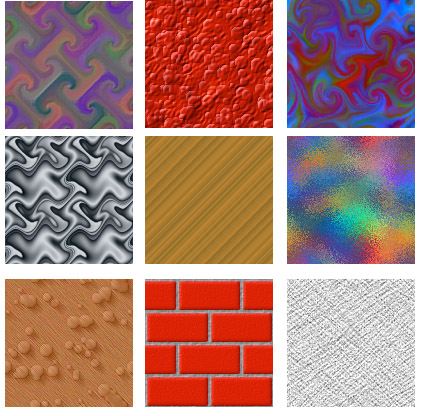
PhotoTools also comes with sample tiles on the CD for you to use. The image to the left is an example of some
of them.
- PhotoButton (Improved)--This plug-in is perfect for creating
buttons and interfac
 e
elements for Web and multimedia projects. Any custom shape can be
saved and added to the pre-built shape list for future use. There
is a drawing grid, that can be turned on or off, to help you construct
buttons. The grid size unit can be changed in five pixel increments.
There is a Snap to Grid feature as well, that can be toggled on and
off. And, the background can be made transparent. Across the top of
the dialog box, you will see four tabs: shape, bevel, color, and texture
for you to use to customize buttons. e
elements for Web and multimedia projects. Any custom shape can be
saved and added to the pre-built shape list for future use. There
is a drawing grid, that can be turned on or off, to help you construct
buttons. The grid size unit can be changed in five pixel increments.
There is a Snap to Grid feature as well, that can be toggled on and
off. And, the background can be made transparent. Across the top of
the dialog box, you will see four tabs: shape, bevel, color, and texture
for you to use to customize buttons.
Shape Tab: Under the shape tab, you can select the shape you want and how
many buttons. There are 15 predefined but completely customizable shapes to start with. They are: circle, ellipse,
round bar, triangle, rectangle, square, pentagon, hexagon, heptagon, octagon, star, snow flake, star 7, star 8,
and arrow. You can create just one button or multiple buttons. When you create multiple buttons, you can apply
the same effects to all of them or apply different textures and colors to each one.
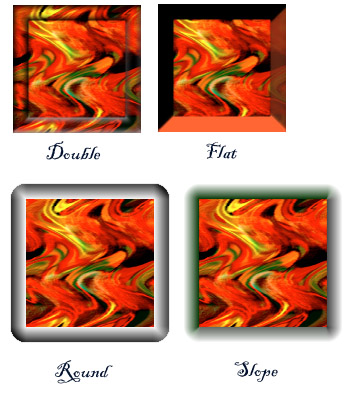
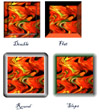
Bevel Tab: Und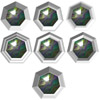 er the bevel
tab, you can select the type of bevel: flat, round, slope, double,
half pipe, triangle, and ramp. See the image to the left for examples.
Also you can select the bevel height, width, softness, and inner
height. Up to 6 er the bevel
tab, you can select the type of bevel: flat, round, slope, double,
half pipe, triangle, and ramp. See the image to the left for examples.
Also you can select the bevel height, width, softness, and inner
height. Up to 6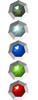 5
points can be added to a shape to create one-of-a-kind buttons. 5
points can be added to a shape to create one-of-a-kind buttons.
Color Tab: Under the color tab, you can color the inner and bevel parts
of each button separately or all together. There are five preset materials to use: chrome, heavy metal, plastic,
rubber, and matte.
Texture Tab: Under the texture
tab, you can use any JPEG file as a texture. You can import a texture
 through the Import button or just
drag any texture file from the desktop directly onto the button.
If you are creating multiple buttons simultaneously, each button
can have its own texture applied to it. You can also use the sample
tile textures that ship with PhotoTools. Also any texture file can
be applied to a button as a bump map to add depth to the surface
of the button. The height and softness of the bump map can be controlled. through the Import button or just
drag any texture file from the desktop directly onto the button.
If you are creating multiple buttons simultaneously, each button
can have its own texture applied to it. You can also use the sample
tile textures that ship with PhotoTools. Also any texture file can
be applied to a button as a bump map to add depth to the surface
of the button. The height and softness of the bump map can be controlled.
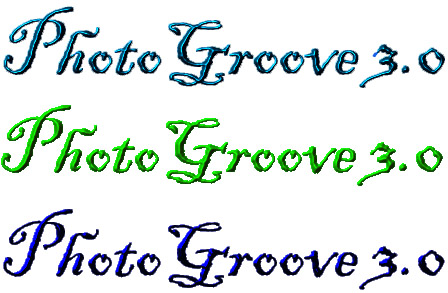
- PhotoGroove (New)--This plug-in is similar to PhotoButton
and they do share in several core
 features and can create similar effects, but they were designed for
different purposes. PhotoGroove works on selections, while PhotoButton
creates beveled buttons and shapes automatically from within the plug-in.
The Bevel shape Editor is easy to use, and you have infinite control
over the number, shape, and spacing of grooved edges using an interactive
shaping grid. You can create complex compound grooves simply by adding
or deleting points on the curve, then change the width and spacing
by dragging the curve to any point on the graph, and you can save
features and can create similar effects, but they were designed for
different purposes. PhotoGroove works on selections, while PhotoButton
creates beveled buttons and shapes automatically from within the plug-in.
The Bevel shape Editor is easy to use, and you have infinite control
over the number, shape, and spacing of grooved edges using an interactive
shaping grid. You can create complex compound grooves simply by adding
or deleting points on the curve, then change the width and spacing
by dragging the curve to any point on the graph, and you can save
 your
shapes for later use. All groove options, including shaping, bevel
width, edge feathering, softness, highlights, and light direction
respond in real-time, and you can optionally view composite layers
to see just how your effects will look with other picture elements.
In addition to the ability to create your own custom bevel shapes,
there are presets: flat, round, slope, double, ramp, half pipe, and
triangle. You also have the choice of surface material such as rubber,
plastic, metal, and chrome. You can use this plug-in to add special
effects to type or any random selection. your
shapes for later use. All groove options, including shaping, bevel
width, edge feathering, softness, highlights, and light direction
respond in real-time, and you can optionally view composite layers
to see just how your effects will look with other picture elements.
In addition to the ability to create your own custom bevel shapes,
there are presets: flat, round, slope, double, ramp, half pipe, and
triangle. You also have the choice of surface material such as rubber,
plastic, metal, and chrome. You can use this plug-in to add special
effects to type or any random selection.
- PhotoBevel--With this component, you are not creating special
bevel shapes, like in PhotoGroove, but you ha
 ve ve
 control over four preset bevel types that can be
applied to an image or floating selection such as text. They are:
flat, round, slope, and double. You can apply a different bevel to
the inside and/or outside edge of the selection area, control bevel
edge tolerance, and apply different colors to the highlights and the
shadow. As in PhotoGroove, all bevel options, including edge feathering,
softness, highlights, shadow intensity, and light direction respond
in real-time. control over four preset bevel types that can be
applied to an image or floating selection such as text. They are:
flat, round, slope, and double. You can apply a different bevel to
the inside and/or outside edge of the selection area, control bevel
edge tolerance, and apply different colors to the highlights and the
shadow. As in PhotoGroove, all bevel options, including edge feathering,
softness, highlights, shadow intensity, and light direction respond
in real-time.
- PhotoCastShadow (Improved)--This shadow generator is very
fast and fun. Yo
 u
can create professional multiple cast shadows and drop shadows. Just
grab a corner, edge, or center of the shadow's wireframe to interactivel u
can create professional multiple cast shadows and drop shadows. Just
grab a corner, edge, or center of the shadow's wireframe to interactivel y rotate, stretch, and skew the shadow to any perspective,
and place it anywhere on the image. Also you can adjust the shadow's
perspective blur to show realistic dimension. Use Invert Shadow to
create useful cutouts and other effects, and select Shadow Only to
isolate the whole shado y rotate, stretch, and skew the shadow to any perspective,
and place it anywhere on the image. Also you can adjust the shadow's
perspective blur to show realistic dimension. Use Invert Shadow to
create useful cutouts and other effects, and select Shadow Only to
isolate the whole shado w
on it's own layers. You can undo and redo effects multiple times,
and save effects settings for future use. There is also a Noise slider.
Noise prevents banding by adding random pixels to break up the smooth
shadow gradation. You can change the blend mode of overlapping shadows
when creating multiple shadows to further emulate the real-life look.
The six blend modes are: normal, multiply, screen, darken, lighten,
and difference. w
on it's own layers. You can undo and redo effects multiple times,
and save effects settings for future use. There is also a Noise slider.
Noise prevents banding by adding random pixels to break up the smooth
shadow gradation. You can change the blend mode of overlapping shadows
when creating multiple shadows to further emulate the real-life look.
The six blend modes are: normal, multiply, screen, darken, lighten,
and difference.
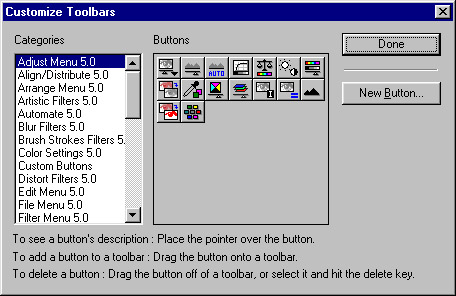
 PhotoBars--This feature helps you save time
by letting you access all Photoshop menu commands from pre-configured,
customizable toolbars. All the toolbars can be hidden or displayed
at any time. You can add, remove, and rearrange buttons according
to your preference and working style. Toolbars can float on your screen
freely or you can embed them along any edge of the window--and instantly
change them from floating to embedded and back again. PhotoBars--This feature helps you save time
by letting you access all Photoshop menu commands from pre-configured,
customizable toolbars. All the toolbars can be hidden or displayed
at any time. You can add, remove, and rearrange buttons according
to your preference and working style. Toolbars can float on your screen
freely or you can embed them along any edge of the window--and instantly
change them from floating to embedded and back again.
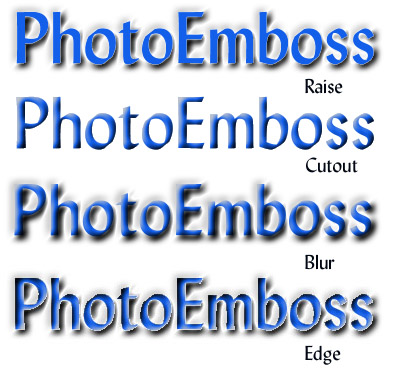
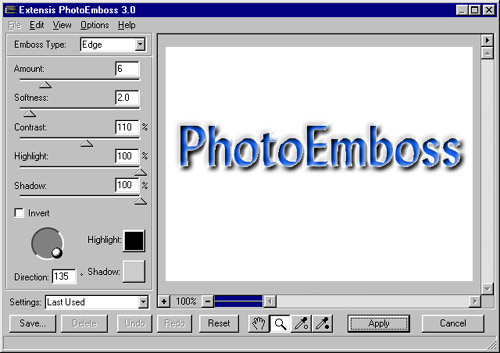
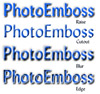
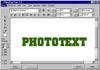
- PhotoEmboss--The controls and embossing styles in this component
give you the
 ability
to creat ability
to creat e
cutouts, embosses, reliefs, recesses, and many other special effects.
PhotoEmboss includes options for selecting the emboss type, along
with the amount of embossing. The four types are: edge, raise, cutout,
and blur. You can control the contrast, softness, highlight and shadow
of the embossing. Plus you can position a directional light source
and customize the color of e
cutouts, embosses, reliefs, recesses, and many other special effects.
PhotoEmboss includes options for selecting the emboss type, along
with the amount of embossing. The four types are: edge, raise, cutout,
and blur. You can control the contrast, softness, highlight and shadow
of the embossing. Plus you can position a directional light source
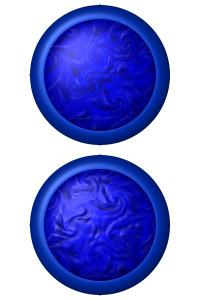
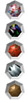
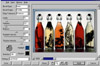
and customize the color of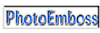 the emboss highlight and shadow. This is a fun
component. You can emboss text and selections. For the top image to
the right, I just embossed the text. For the second image to the right,
I embossed the whole layer, then went in and embossed the text. the emboss highlight and shadow. This is a fun
component. You can emboss text and selections. For the top image to
the right, I just embossed the text. For the second image to the right,
I embossed the whole layer, then went in and embossed the text.
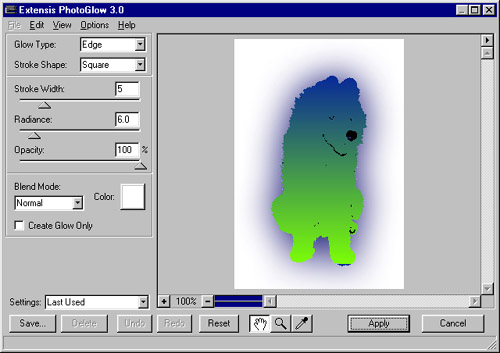
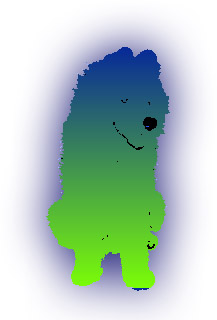
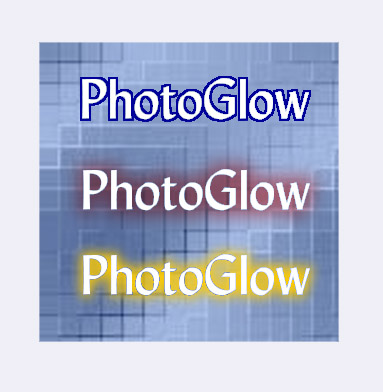
- Pho
 toGlow--This component is perfect for
creating an image of a neon sign or a candle. You apply a high radiance
for a soft, subtle glow or a low toGlow--This component is perfect for
creating an image of a neon sign or a candle. You apply a high radiance
for a soft, subtle glow or a low radiance
for an intense, hard, bright glow. A solid glow can be applied to
a selected image or just to its edges. There are controls to determine
how far the glow should extend. You radiance
for an intense, hard, bright glow. A solid glow can be applied to
a selected image or just to its edges. There are controls to determine
how far the glow should extend. You 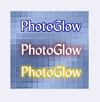 can also control its radiance. In addition, you
can add a solid stroke arou can also control its radiance. In addition, you
can add a solid stroke arou nd
any selection and change glow opacity (how much the glow will show
through) to highlight an image containing light text on a light background. nd
any selection and change glow opacity (how much the glow will show
through) to highlight an image containing light text on a light background.
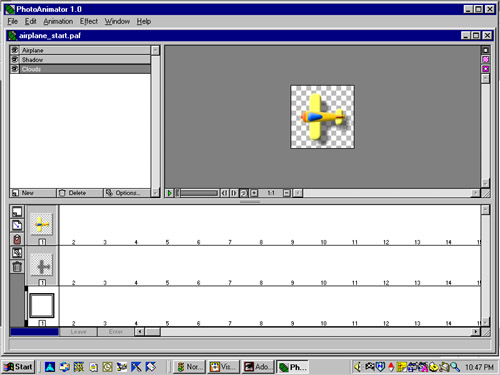
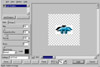
- PhotoAnimator (New)--Building animated GIFs is easy. PhotoAnimator
automatically generates the frames and transitions needed for animation,
while optimizing file sizes. The PhotoAnimator window is the primary
window, containing three separate panes: the Layers pane, the Preview
pane, and the Filmstrip pane. You start with raw animation elements
saved either in native Photoshop forma
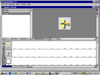 t,
then use PhotoAnimator's intuitive tools to add special effects to
create the animation, or import existing animations and use PhotoAnimator
to enhance them. You can create special effects using masks, filters,
and tra t,
then use PhotoAnimator's intuitive tools to add special effects to
create the animation, or import existing animations and use PhotoAnimator
to enhance them. You can create special effects using masks, filters,
and tra nsitions such as Fade,
Wipe, Barn Door, and Gradient Mask. Since PhotoAnimator is a stand-alone
application, you don't need to have Photoshop open to use it. The
image to the right was created using Tutorial 1 from the User's Guide. nsitions such as Fade,
Wipe, Barn Door, and Gradient Mask. Since PhotoAnimator is a stand-alone
application, you don't need to have Photoshop open to use it. The
image to the right was created using Tutorial 1 from the User's Guide.
Layers Pane: Displays all the layers available for the animation. Each layer
can contain from one to 300 animation frames. This pane functions similar to the Photoshop Layers palette, allowing
you to create, name, hide, delete, and reposition layers.
Preview Pane: Displays a preview of the animation. This preview is always
available and can be viewed from any dialog box as you work with animation effects.
Filmstrip Pane: Displays the cells and frames that make up the animation.
Layers in this pane correspond to the layers in the Layers pane. This pane also provides access to tools and options
for working with the cells, frames, and images.
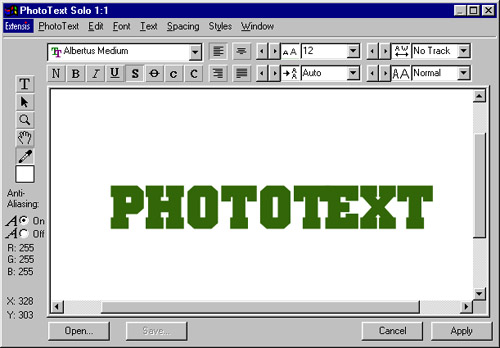
- PhotoText (Freeware)--With this component, you can apply
bold, italic, outline and shadow
 styles without requiring the corresponding printer fonts. Define character-level
styles and reapply them to new text with one mouse click. PhotoTools
3.0 does not include this component, but it came with PhotoTools 2.0
or you can download it free from Extensis. Even though Photoshop has
improved on its text features, this plug-in has unique features that
extend the Photoshop 5.0 Type tool.
styles without requiring the corresponding printer fonts. Define character-level
styles and reapply them to new text with one mouse click. PhotoTools
3.0 does not include this component, but it came with PhotoTools 2.0
or you can download it free from Extensis. Even though Photoshop has
improved on its text features, this plug-in has unique features that
extend the Photoshop 5.0 Type tool.
Users Guide: Extensis always does a good job with its manuals. The User's
Guide, about 183 pages, is very thorough, and includes 7 tutorials:
(1) Getting Started--Basic Animations; (2) Working with Masks; (3) Working with Transitions and Gradient Masks;
(4) Working with Nested Sub-Animations; (5) Exporting; (6) Creating a Texture for Buttons; and (7) Creating Buttons
and Adding Textures.
|