|
The book is divided into 24 one hour sessions or chapters. Each session includes step-by-step tutorials on how
to use the features covered in that chapter. These chapters are written with the goal of helping you gain the knowledge
you need to get you going as quickly as possible. Each lesson covers a specific topic that helps you not only accomplish
a certain task using Paint Shop Pro but also helps to build your expertise and comfort level when it comes to creating
and working with digital graphics. I went through the book, from cover to cover, and performed all of the tutorials.
Below, I will briefly describe each chapter and present my images that I made following the tutorials.
Part I: Getting Started in Paint Shop Pro
Hour 1 Paint Shop Pro Basics--includes basic information on installation
of Paint Shop Pro and an overview of the the program's interface and new features.
Hour 2 Tools, Preferences, and Menus--discusses the toolbar; the toolbox and
its options and tools; the various palettes and menus; and the preferences you can set to customize Paint Shop
Pro.
Hour 3 Opening, Saving, and Printing Files--introduces you to actions in Paint
Shop Pro of opening a file; saving a file; importing and exporting files; and the basics of printing files.
Hour 4 Creating Your First Image--provides basic information on creating an
image; editing an image; and fixing mistakes in an image. You learn to use the shapes tool; how to avoid jaggedness
or aliasing in in image; and how to use brush tips.
Part II: Editing Your Images
Hour 5 Creating and Working with Selections--introduces
you to using the selection tools; editing selections; loading and
saving selections; and learning about alpha channels. A selec tion
masks off an area of an image so that you can make changes to that
area without affecting the rest of the image. You can fill selections,
run effects on them, save selections; copy and paste selections; and
add and subtract selections. The author includes a step-by-step tutorial
on selections to show you how you can create an interesting image
from just a few selections. Following the tutorial, I made the grey
shape. I then got creative and added the two red balls which are picture
tubes and the frame and matte using Photo/Graphic Edges by Auto F/X;
by just Hour 5 you are learning how easy Paint Shop Pro is to use. tion
masks off an area of an image so that you can make changes to that
area without affecting the rest of the image. You can fill selections,
run effects on them, save selections; copy and paste selections; and
add and subtract selections. The author includes a step-by-step tutorial
on selections to show you how you can create an interesting image
from just a few selections. Following the tutorial, I made the grey
shape. I then got creative and added the two red balls which are picture
tubes and the frame and matte using Photo/Graphic Edges by Auto F/X;
by just Hour 5 you are learning how easy Paint Shop Pro is to use.
Hour 6 Working with Deformations--you
learn to use the deformation tool; resize and rotate your images;
 add perspective to images; and use fading and fills.
This is probably one of my most favorite tools in Paint Shop Pro,
and the author simplifies the tasks involved in using the deformation
tool for shadowed text. I just added the button border from Paint
Shop Pro to add some effect. add perspective to images; and use fading and fills.
This is probably one of my most favorite tools in Paint Shop Pro,
and the author simplifies the tasks involved in using the deformation
tool for shadowed text. I just added the button border from Paint
Shop Pro to add some effect.
Hour 7 Drawing Tools and Techniques--Paint
Shop Pro provides a numb er
of tools and this chapter introduces the drawing tools; tool options;
drawing shapes; drawing normal lines; and drawing Bezier lines. I
followed the step-by-step tutorial to create the bulls-eye shape and
then added the frame from Photo/Graphic Edges. er
of tools and this chapter introduces the drawing tools; tool options;
drawing shapes; drawing normal lines; and drawing Bezier lines. I
followed the step-by-step tutorial to create the bulls-eye shape and
then added the frame from Photo/Graphic Edges.
 Hour 8 Painting Tools and Techniques--discusses
painting and drawing with the paint brushes tool; using the airbrush
tool; creating custom brush tips, using the flood fill tool; and working
with the clone brush tool. I used the author's information to make
the following custom brush tip. I scanned in two rocks from the Berlin
Wall (the real McCoy, gotten on a trip to Germany) and made a custom
brush from the scanned rocks. This custom brush was used for the background
of this image. Hour 8 Painting Tools and Techniques--discusses
painting and drawing with the paint brushes tool; using the airbrush
tool; creating custom brush tips, using the flood fill tool; and working
with the clone brush tool. I used the author's information to make
the following custom brush tip. I scanned in two rocks from the Berlin
Wall (the real McCoy, gotten on a trip to Germany) and made a custom
brush from the scanned rocks. This custom brush was used for the background
of this image.
Hour 9 Using Color Effectively--includes
information on the color tools; learning the color models used with
Paint Shop Pro; adjusting shadows, highlights, and midtones; and adjusting
hue, saturation, and luminance.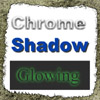
Hour 10 Creating Cool Text Effects--learn
how to use the text tool;  create
wooden-textured text; create chrome text; add a drop shadow; and add
glow to your text. This was a fun chapter. The author provides easy
to follow steps to create different text effects. He describes feathering,
the hot wax coating effect, and using the Gaussian Blur. I added the
frame and matte from Photo/Graphic Edges. create
wooden-textured text; create chrome text; add a drop shadow; and add
glow to your text. This was a fun chapter. The author provides easy
to follow steps to create different text effects. He describes feathering,
the hot wax coating effect, and using the Gaussian Blur. I added the
frame and matte from Photo/Graphic Edges.
Part III: Tools to Work Efficiently
Hour 11 Layers--understanding
layers is essential for learning how Paint S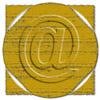 hop
Pro works. The author discusses understanding layers; using the layers
palette; using the layers menu; using layers effectively; and understanding
the blending modes. I followed his step-by-step tutorial for the embossed
text with a wooden background. Again, I used a frame from Photo/Graphic
Edges for the image. hop
Pro works. The author discusses understanding layers; using the layers
palette; using the layers menu; using layers effectively; and understanding
the blending modes. I followed his step-by-step tutorial for the embossed
text with a wooden background. Again, I used a frame from Photo/Graphic
Edges for the image.
Hour 12 Masks--masks can be difficult
to understand but the author introdu ces
the subject to the reader in a clear manner. You learn what masks
are and what they do; how to use the mask menu; and how to create
a simple and then a complex mask. I followed the tutorial and created
the black text masked with a linear gradient to allow the textured
woodgrain background to show through. I then added the frame from
Photo/Graphic Edges. ces
the subject to the reader in a clear manner. You learn what masks
are and what they do; how to use the mask menu; and how to create
a simple and then a complex mask. I followed the tutorial and created
the black text masked with a linear gradient to allow the textured
woodgrain background to show through. I then added the frame from
Photo/Graphic Edges.
Hour 13 Channels--learn about channels and how they are used; splitting
and combining channels; identifying information in channels; and making channels work for you.
Hour 14 Picture Tubes--tubes are in! The author introduces you to tubes
and relates how to use picture tubes; find tubes; and creating your own tubes.
Hour 15 Applying Filters--Paint Shop Pro has built in filters and supports
many third-party filters. The author discusses filters in general; finding cool filters; using Paint Shop Pro's
build-in filters; installing plug-ins; and using third-party filters. Paint Shop Pro's button filter was used to
create the border for the image in the deformation tool section, and the shadow tool was used in my major white
headings. Edges and effects from Auto F/X's Photo/Graphic Edges, a third-party plug-in, that works within Paint
Shop Pro or as a stand-alone program, have been used extensively in this review. I felt this was an important chapter.
The author provides a list of third-party filters and their Web addresses. He then tells you how to install plug-ins
and have Paint Shop Pro recognize them, even if they are installed for another program such as Photoshop.
Part IV: Advanced Paint Shop Pro Tasks
Hour 16 Special Effects--in this
chapter the author shows you how to apply y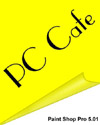 our
knowledge to create some effects that produce more advanced images.
You learn to add a page curl effect; create a metallic effect; and
use bevels effectively. I followed the page curl tutorial and created
this image. I then added the text. Again the author takes a complex
task and breaks it down into manageable steps that are easy to follow.
He provides another tutorial on using a bevel effect for text, which
I included in Hour 10 with the other text effects. our
knowledge to create some effects that produce more advanced images.
You learn to add a page curl effect; create a metallic effect; and
use bevels effectively. I followed the page curl tutorial and created
this image. I then added the text. Again the author takes a complex
task and breaks it down into manageable steps that are easy to follow.
He provides another tutorial on using a bevel effect for text, which
I included in Hour 10 with the other text effects.
Hour 17 Retouching Your Images--learn to use the tools to fix many of the
worst of your images. The author tells you how to use the retouching tools; fix brightness and contrast; removing
dust marks and scratches; and remove portions of an image.
Hour 18 Coloring and Color Correction--tackles the issues related to color
such as understanding the theory behind good color; understanding gamma correction; adjusting the hue, saturation,
and lightness; working the the map hue command; adjusting the reds, greens, and blues in your color; and grasping
color correction in a nutshell.
Hour 19 Compositing--learn how to create collages, placing images together
in a way that makes it obvious that the images are from different sources, and photo montages, creating a picture
from other images and making it seem believable.
Hour 20 Combining Advanced Techniques/Spectacular
Examples--this is another fun chapt er
where you learn to use some Paint Shop Pro tools to create advanced
images. You learn to outline text and other objects; fill text with
textures or photos; and create an interface. The white headings for
this review were created following the tutorial on outlining text.
I then added a drop shadow. See the example of outlined text under
Hour 10. The most impressive lesson was the metallic metal interface.
The author's tutorial was precise, fun, and easy. er
where you learn to use some Paint Shop Pro tools to create advanced
images. You learn to outline text and other objects; fill text with
textures or photos; and create an interface. The white headings for
this review were created following the tutorial on outlining text.
I then added a drop shadow. See the example of outlined text under
Hour 10. The most impressive lesson was the metallic metal interface.
The author's tutorial was precise, fun, and easy.
Part V: Paint Shop Pro for the Web
Hour 21 Preparing Your Graphics for the
Web--the following Web-related issues are covered in this
chapter, such as working with file formats; adjusting color depth;
using palettes; previewing your images on the Web; understanding hexadecimal
notation; and dithering and anti-aliasing.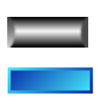
Hour 22 Buttons and Seamless Tiles--various techniques related to buttons
and tiles are covered. The author discusses creating ordinary buttons; creating 3D textured buttons; creating seamless
tiles; and creating seamless tiles with Paint Shop Pro. Following the step-by-step tutorials, I created the two
buttons.
Hour 23 Animation--Jasc's Animation Shop which ships with paint Shop Pro
5 lets you create cool animations for your Web pages. This chapter provides information on what animation is and
how it works; why use animation; creating your first animation, including animated GIFs for your Web pages; editing
your first animation; using transitions; and creating text effects.
Hour 24 Advanced Animation--learn how to use layered images and masks in
animation; create a spinning globe animation; and understand advanced animation techniques.
|
 Title:
Sams Teach Yourself Paint Shop Pro 5 in 24 Hours


