|
|
Click on a thumbnail to enlarge it. Use your browser's "BACK" button to return to this review when done. |
| IBM NetObjects TopPage is a new Web page authoring and design software program which is suitable for beginners and experts to create Web pages without any HTML knowledge or programming skills. It includes all the tools necessary to create a Web page, including a WebArt Designer which lets you create logos and buttons, and a Web Animator which lets you create animation GIF files with just a few simple steps. There is a step-by-step multimedia tutorial that guides you through the various aspects of Web design, and the program includes up-to-date technology--such as Cascading Style Sheets, Java applets and Dynamic HTML. TopPage is part of a suite of three software programs for small businesses, individuals, and schools who want to build their own Web site quickly and inexpensively, but with professional results. The other two programs are: (1) IBM Perfect Photo--for manipulating digital camera shots, turn scanned photographs into finished designs, or customizing greeting cards, brochures, posters and calendars; (2) IBM Startup 2 for e-business--includes tools necessary to go online to publish and process credit card orders. Prices: TopPage--$59.95; Perfect Photo--$39.95; and Startup 2 for e-bussiness--$29.95. Additional information can be obtained from the IBM Web site for TopPage: http://www.JP.ibm.com/esbu/E/toppage/index.htm |
| NetObjects TopPage is an all-in-one tool for Beginners, Intermediate, and Advanced PC users. It has a user-friendly interface and templates that make it perfect for beginners. But the program also has advanced features so that intermediate and advanced Web designers can apply Dynamic HTML effects to links or graphics, edit Cascading Style Sheets, build editable site maps, crop or rotate images, build JavaScript, and create and manage frames. |
|
| Installation |
|
The program is easy to install. But the Tutorial and User's Guide are accessible only with a Custom Install, not the Typical Install. There is no printed manual or tutorial included with the program, but there is a User's Guide on the CD, and you can print it out. IBM states that they will include the Tutorial and User's Guide in the Typical Install with the next version. They will also include more printed material. |
| Interface |
The interface is very intuitive and user-friendly. The main window of
TopPage has a typical Windows menu bar on the top, with tool bars directly
below. The site management area is on the left of the screen and is used
to display information for mana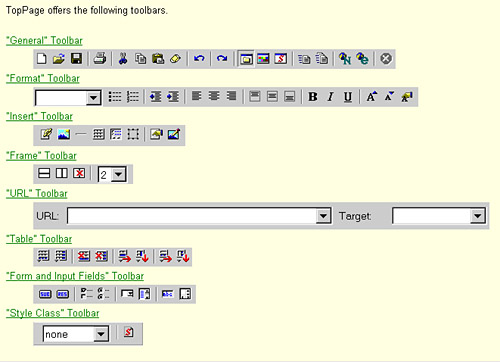 ging
the site, such as the link structure and file lists. There are three panes
on the Link Manager: Link Tab--displays the link ging
the site, such as the link structure and file lists. There are three panes
on the Link Manager: Link Tab--displays the link 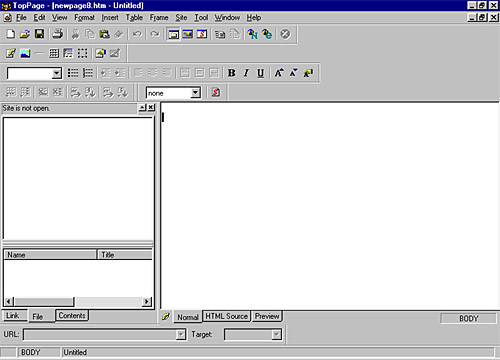 layers
starting from the top page; File Tab--a list of folders and files within
the site; and Contents Tab--images, sounds, or HTML files in the selected
folder appear here. On the right side of the screen is the page edit area,
which is used for creating and editing pages. You can open multiple pages
at the same time. There are three panes for viewing the page edit area:
Normal--where you create and edit a page; HTML--used to edit the HTML
source directly;and Preview--used to check how a page will look in a Web
browser. There is also a status bar along the bottom that displays an
explanation about the menu or tags that are currently being edited. layers
starting from the top page; File Tab--a list of folders and files within
the site; and Contents Tab--images, sounds, or HTML files in the selected
folder appear here. On the right side of the screen is the page edit area,
which is used for creating and editing pages. You can open multiple pages
at the same time. There are three panes for viewing the page edit area:
Normal--where you create and edit a page; HTML--used to edit the HTML
source directly;and Preview--used to check how a page will look in a Web
browser. There is also a status bar along the bottom that displays an
explanation about the menu or tags that are currently being edited. |
|
Creating a Site |
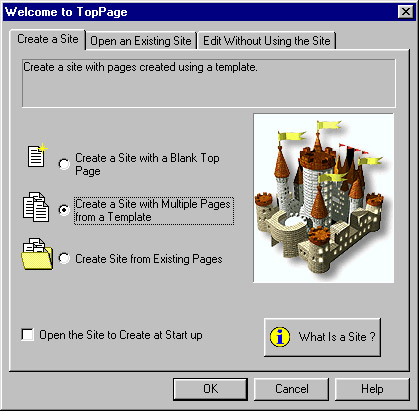
TopPage provides two procedures to help you
build your site: Opening Dialog Box
and Site
Wizard. Each one leads you step-by-step
through
the process. It is an easy process
with both
methods and does not involve many steps
or
take a long time.Opening Dialog Box--With the Opening Dialog Box, you can create a new page and site; create a site with multip |
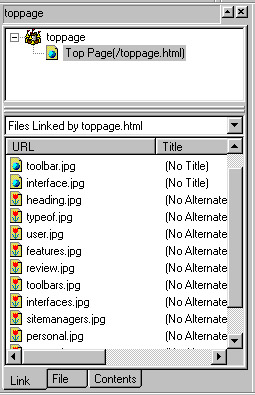
| Site Management Tools |
TopPage has a variety of functions and features
that help you manage your site. The site
management area or Site Manager displays
information that is used to manage a site,
such as the link structure and file lists.
The Site Manager is displayed to the left
of your working page and can be closed if
you need more room for display. These three
panes and the page editing area are linked,
and when you save a document, the panes are
updated. There are three panes: Link Pane,
File Pane, and Contents Pane, with each pane
having an upper and lower area.Link Pane--Displays the link layers starting from the top page. In the upper area of the Li |
| Besides the Site Manager there are other features in TopPage that help you manage your site. Link update is performed automatically when necessitated by a file name change. Site transfer is supported (all the files constituting a site can be transferred). You can perform a check of the entire site. |
| Style Sheets & Manager |
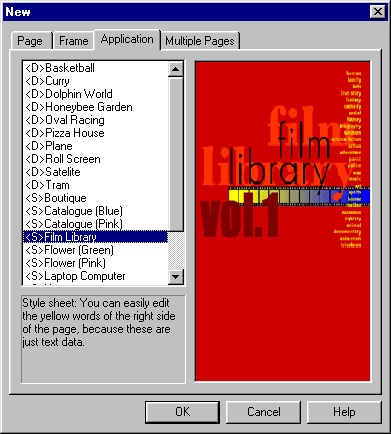
TopPage supports CSS1 and CSS2 (Cascading Style Sheet, Level 1 and 2).
A style sheet makes it easy for users to change the appearance of Web
pages and to unify the appearance of the entire site. You can set such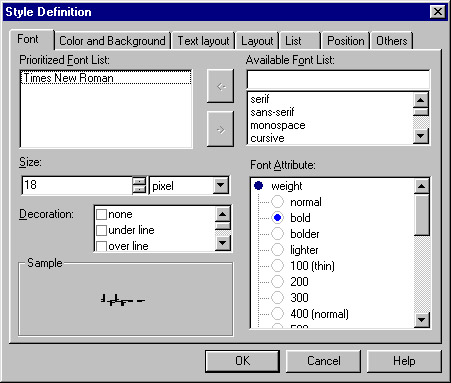 styles as font name, font size, font color, appearance such as bold and
italic, and many other attributes. I created a style for the blue section
headings for this review. There is a Style Definition dialog box where
you can define styles. Some of the templates in TopPage use style sheets.
A variety of factors in an HTML document can be set with a style sheet.
styles as font name, font size, font color, appearance such as bold and
italic, and many other attributes. I created a style for the blue section
headings for this review. There is a Style Definition dialog box where
you can define styles. Some of the templates in TopPage use style sheets.
A variety of factors in an HTML document can be set with a style sheet.Set the Style for an HTML Tag--You can directly change the style of an element (for example, main body, paragraph, and headings) in a document. You can set the color of heading "H1" to red and all H1 headings will be displayed in red. You can set the font size of paragraphs "P" to 12 points and all paragraphs in the document will be displayed with a 12-point font.TopPage has a Style Sheet Manger where you can create, add, and edit styles. There are two panes: Style List Pane and Current Style Status Pane. Style List Pane--Displays the object, class, and ID for which the style is defined. You can add, edit or delete style by using the Add, Edit, and Delete buttons.Despite the fact that style sheets make it easier to design a site, not all Web browsers can display them and the same style sheet might appear differently depending on the Web browser used. TopPage advises beginners of this fact and suggests: (1) create your Web pages without using a style sheet; (2) change the appearance using a style sheet; and (3) check the appearance of your Web pages on different browsers. For advanced users, there is an excellent Appendix in the User's Guide that describes what HTML tags and CSS attributes are supported by TopPage. |
|
|
| Editing Tools |
You have various editing tools in TopPage.
You can edit frames while viewing the layout
on the screen; perform source editing and
preview the results by simply clicking the
corresponding tabs; and create, edit, and
change attributes such as heading, list,
horizontal rule, link, table, form, and frame.
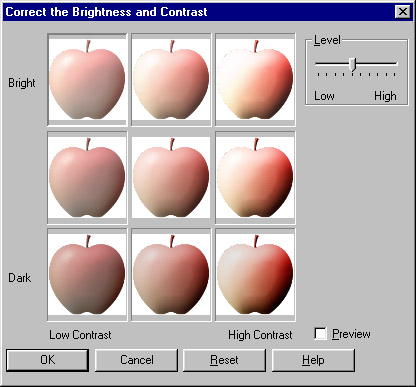
With the Edit Image dialog box you can process
images while editing a page, and perform
the following alterations: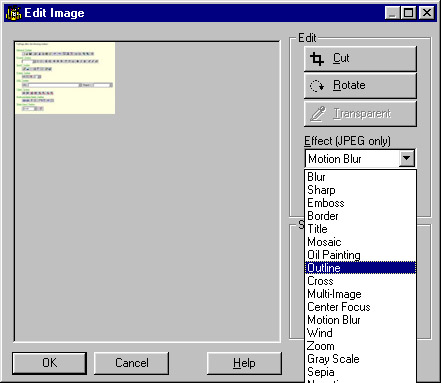
|
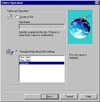
| File Transfer |
TopPage allows you to upload directly from within the program or you
can use other FTPs. Created Web pages and/or a site can be transferred
easily by using TopPage's Site Upload and Page Upload features. You need
to choose a destination server before you can transfer a site, and TopPage
has a wizard to help you choose a server that is easy to navigate even
for a beginner. There is a Site Check function that enables you to find
errors in the site for images without alternate text and spelling errors.
There is also a file transfer program to use when you want to transfer
individual files, delete a file on the server, or view the list of files
on the server.
choose a destination server before you can transfer a site, and TopPage
has a wizard to help you choose a server that is easy to navigate even
for a beginner. There is a Site Check function that enables you to find
errors in the site for images without alternate text and spelling errors.
There is also a file transfer program to use when you want to transfer
individual files, delete a file on the server, or view the list of files
on the server. |
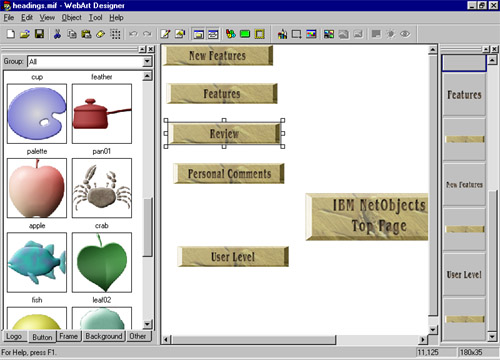
| WebArt Designer |
WebArt Designer is a tool that makes it feel
easy to create various materials for your
Web pages. The source materials are referred
to as objects. There are the following types
of objects: Logo, Button, Photo Frame, Clip
Art, and Image. Objects are not placed on
the canvas at random. Instead, they are stacked
in order so that the last one to be placed
appears to be on the top of the stack. For
example, if you place a button first and
lay a logo over that button, the two objects
are stacked sequentially in the order in
which they were placed. On the screen, the
logo appears to be written on the button.
Using WebArt designer, a variety of objects
can be stacked on a canvas to create new
images. You can overlay a logo on a button,
a logo on a photograph, and then a photo
frame on that photo. In this way, you can
combine multiple objects to create relatively
complicated images. The title and headings
for this review were made with WebArt Designer
in a matter of minutes.Interface--In the center of the main window, a blank white rectangle appears which is called the canva Wizards--There are the following wizards: logo, button, and photo frame. They are |
| Web Animator |
Web Animator is a tool for animating GIF
image files, that allows you to easily create
moving images on your Web pages. You can
create animations using the same principle
as an animated cartoon or a flipbook. You
can add animation to an image to give it
greater impact. You can paste an animated
GIF onto a page in the same way as a regular
image file. You can view it on a regular
Web browser without any special plug-ins.
Making animations is fun with this program.
Interface--The animation window displays the animation that is currently being edite |
If you are planing to create a Web site or
redesign an existing site, run out and buy
this program. I was very impressed. I have
to admit when I first received the application
for review and saw the low price of $59.95,
I thought, oh well, this is probably one
of those cheap, plastic-fantastic programs
that you can buy at your local discount store
and would love to give to your worst enemy
so that they would produce a tacky and unprofessional
site. I thought I would give it just a quick
review and go on to review more expensive
Web design programs. Well, I was pleasantly
surprised to find out that I was wrong. Not
only did I like the program, I felt it was
professional enough to do the review in and
that it deserved a thorough and lengthy review.
The program was so intuitive that I did not
experience any problem writing the review
in another application. Most of the commands
or functions were similar, and if not, it
was easy to find the correct ones. Even though
there were a few features in other programs
that I found lacking in TopPage, I was more
impressed by what it did include than disappointed
by what it didn't. Below is just a summary
of some of the reasons whyI thought the program
rated five stars.
|
| Processor: Pentium (166 MHz or more recommended) Operating System: Windows 95/98 or NT 4.0 Memory: 16MB (32MB recommended) Hard Disk Space: 30MB (150MB is required for all samples) VGA (640x480, 256 colors) |
There is a wealth of information on creating a Web site on the Internet.
IBM has supplied us with some tips, also. Click on the image on the right
for tips on creating a Web site. The Internet has a wealth of information on creating a Web site and on
learning HTML. A good source to check out is the CNET Web Building site.
It has information on everything and anything you would want to know about
Web building, plus free downloads and free tutorials. http://www.builder.com
The Internet has a wealth of information on creating a Web site and on
learning HTML. A good source to check out is the CNET Web Building site.
It has information on everything and anything you would want to know about
Web building, plus free downloads and free tutorials. http://www.builder.com |
| Graphics: IBM NetObjects TopPage Web Page Editor: IBM NetObjects TopPage Scanner: Hewlett Packard ScanJet 6250C Professional Series |
| |


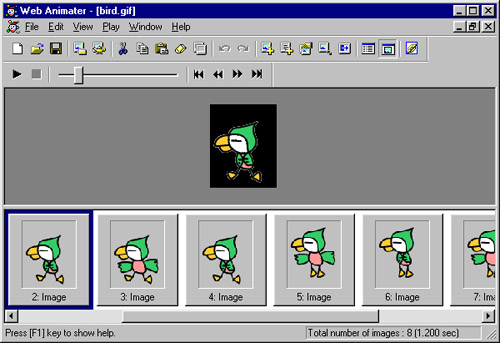
 s
similar to a single frame on a reel of a movie.
s
similar to a single frame on a reel of a movie.